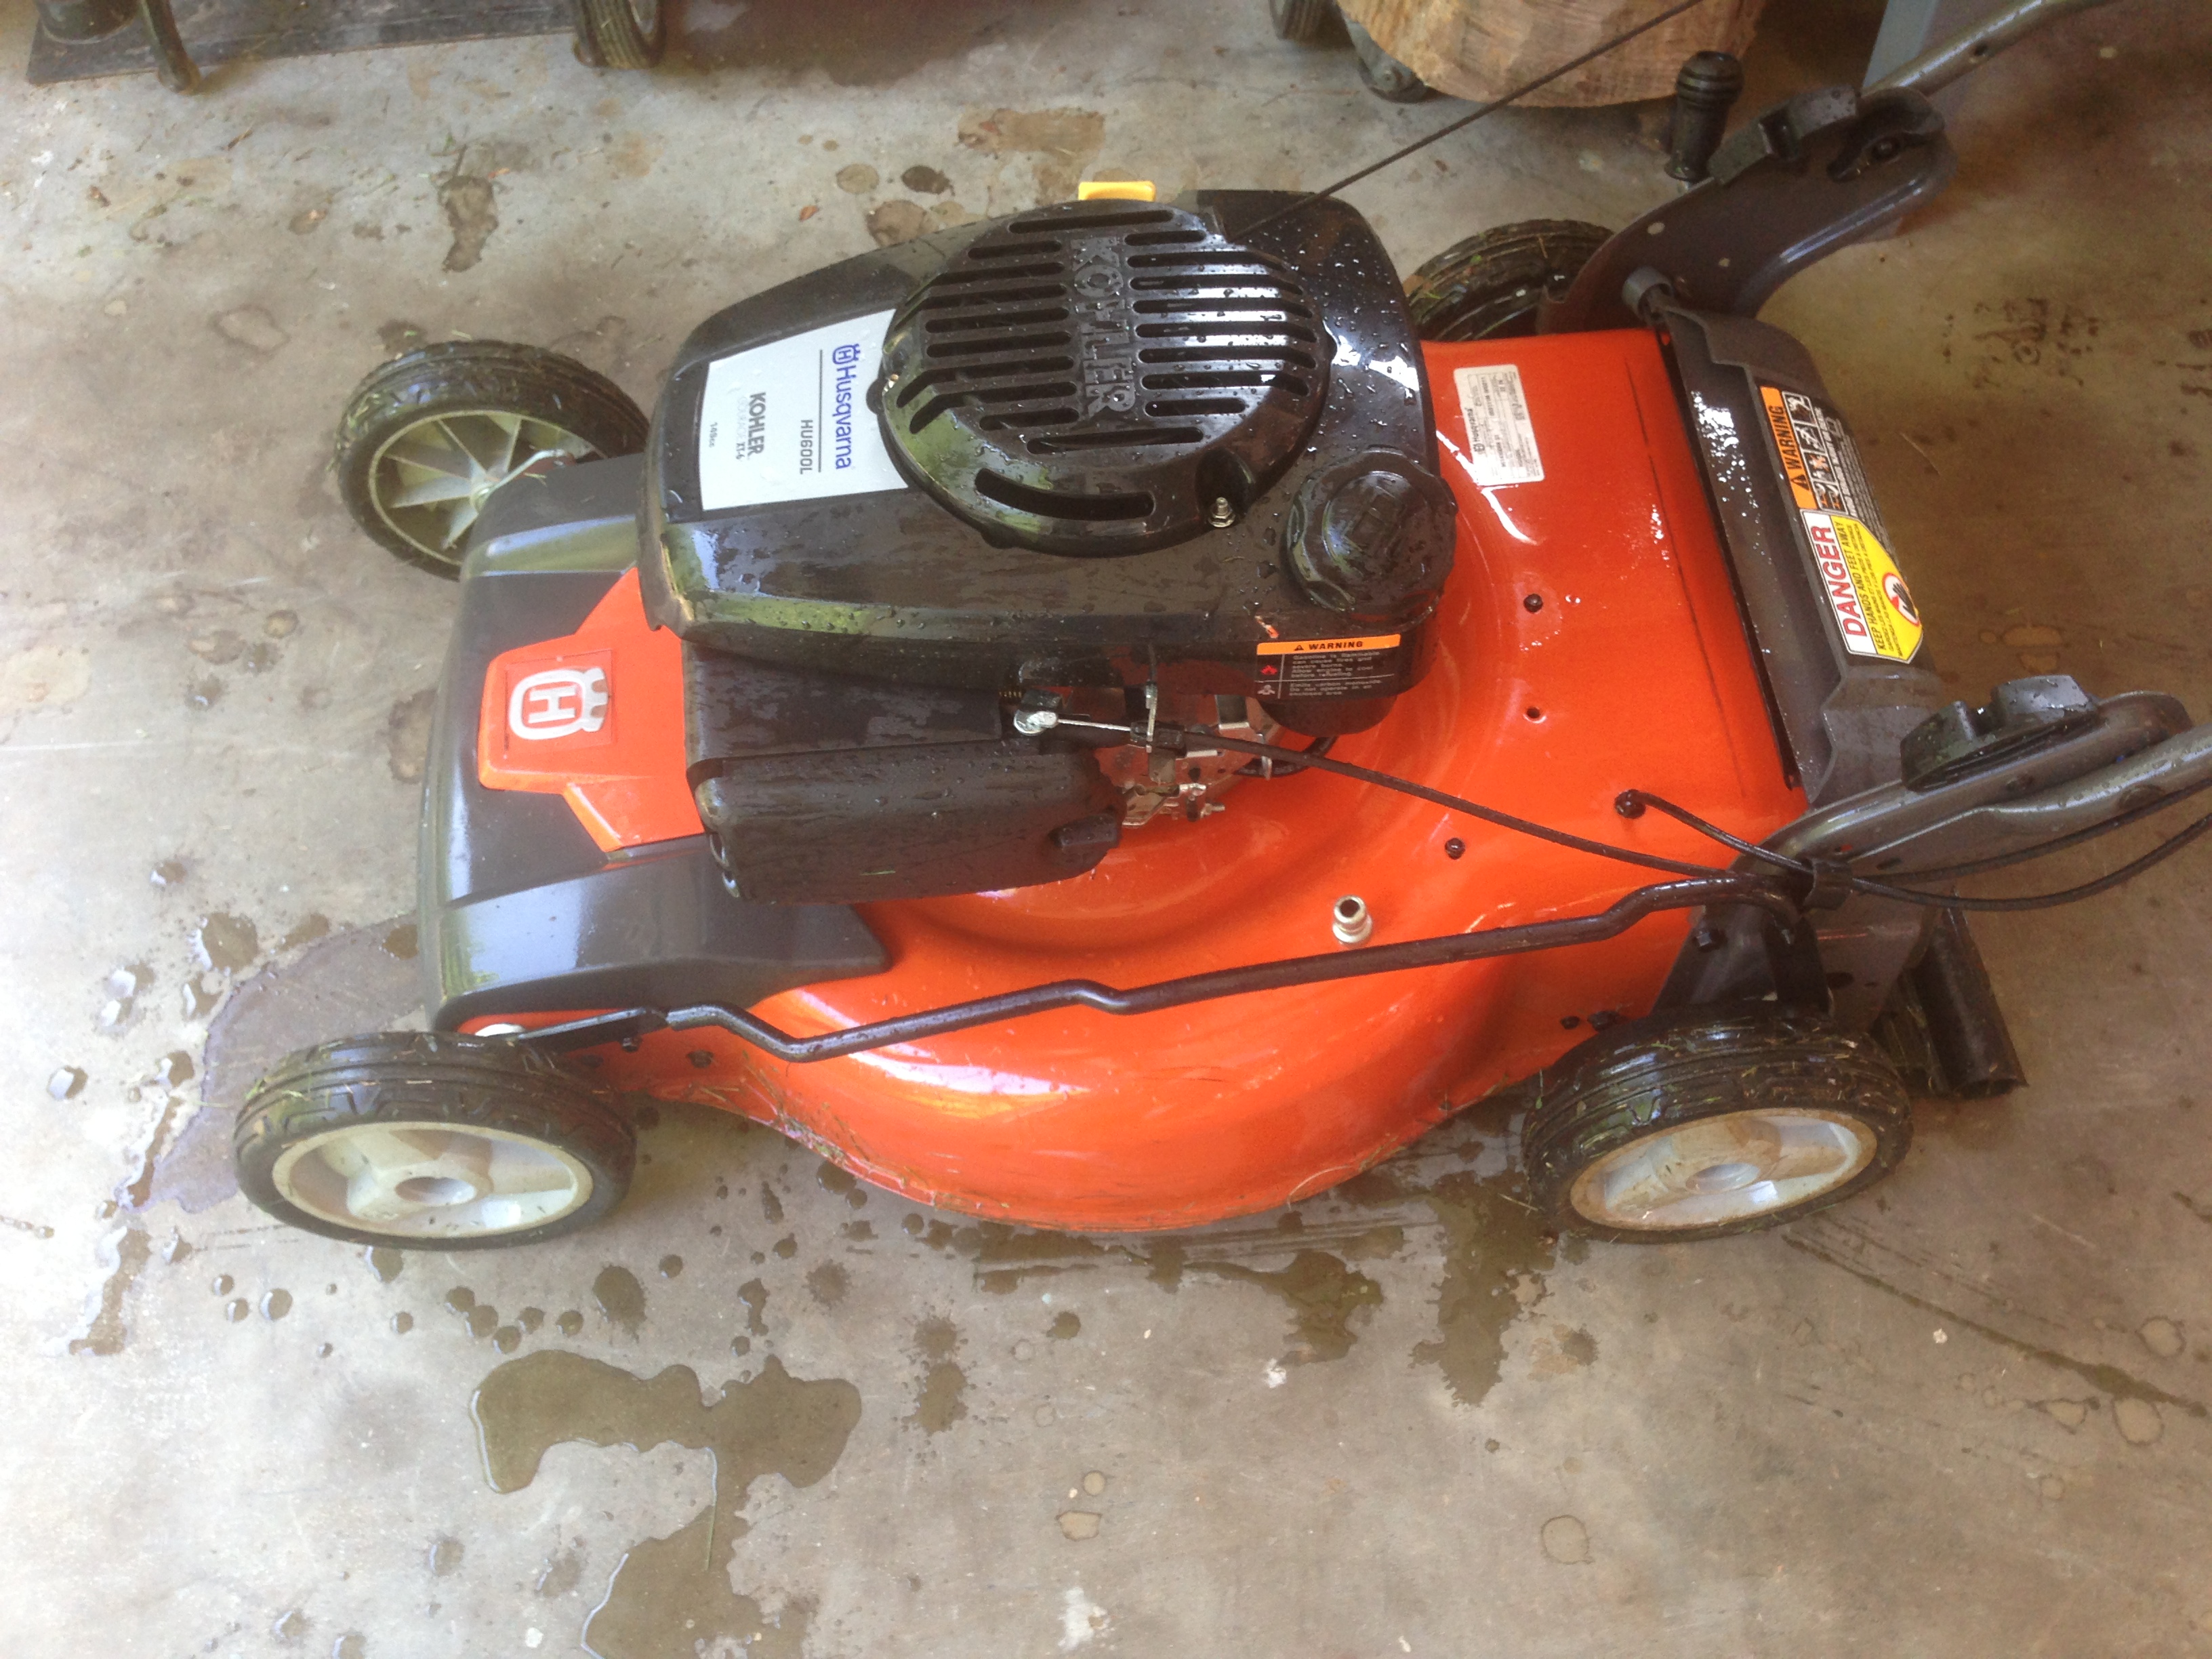
When last I heated my home with wood, well over 30 years ago, water wood stoves or wood stove boilers were in their infancy and just being developed by a few scattered entrepreneurs. While I have not researched their growth or growing pains they seem to have come a long way. We own the Heatmaster 5000 and overall we are delighted with it. There are a few issues with it that I will discuss at the end of this article.
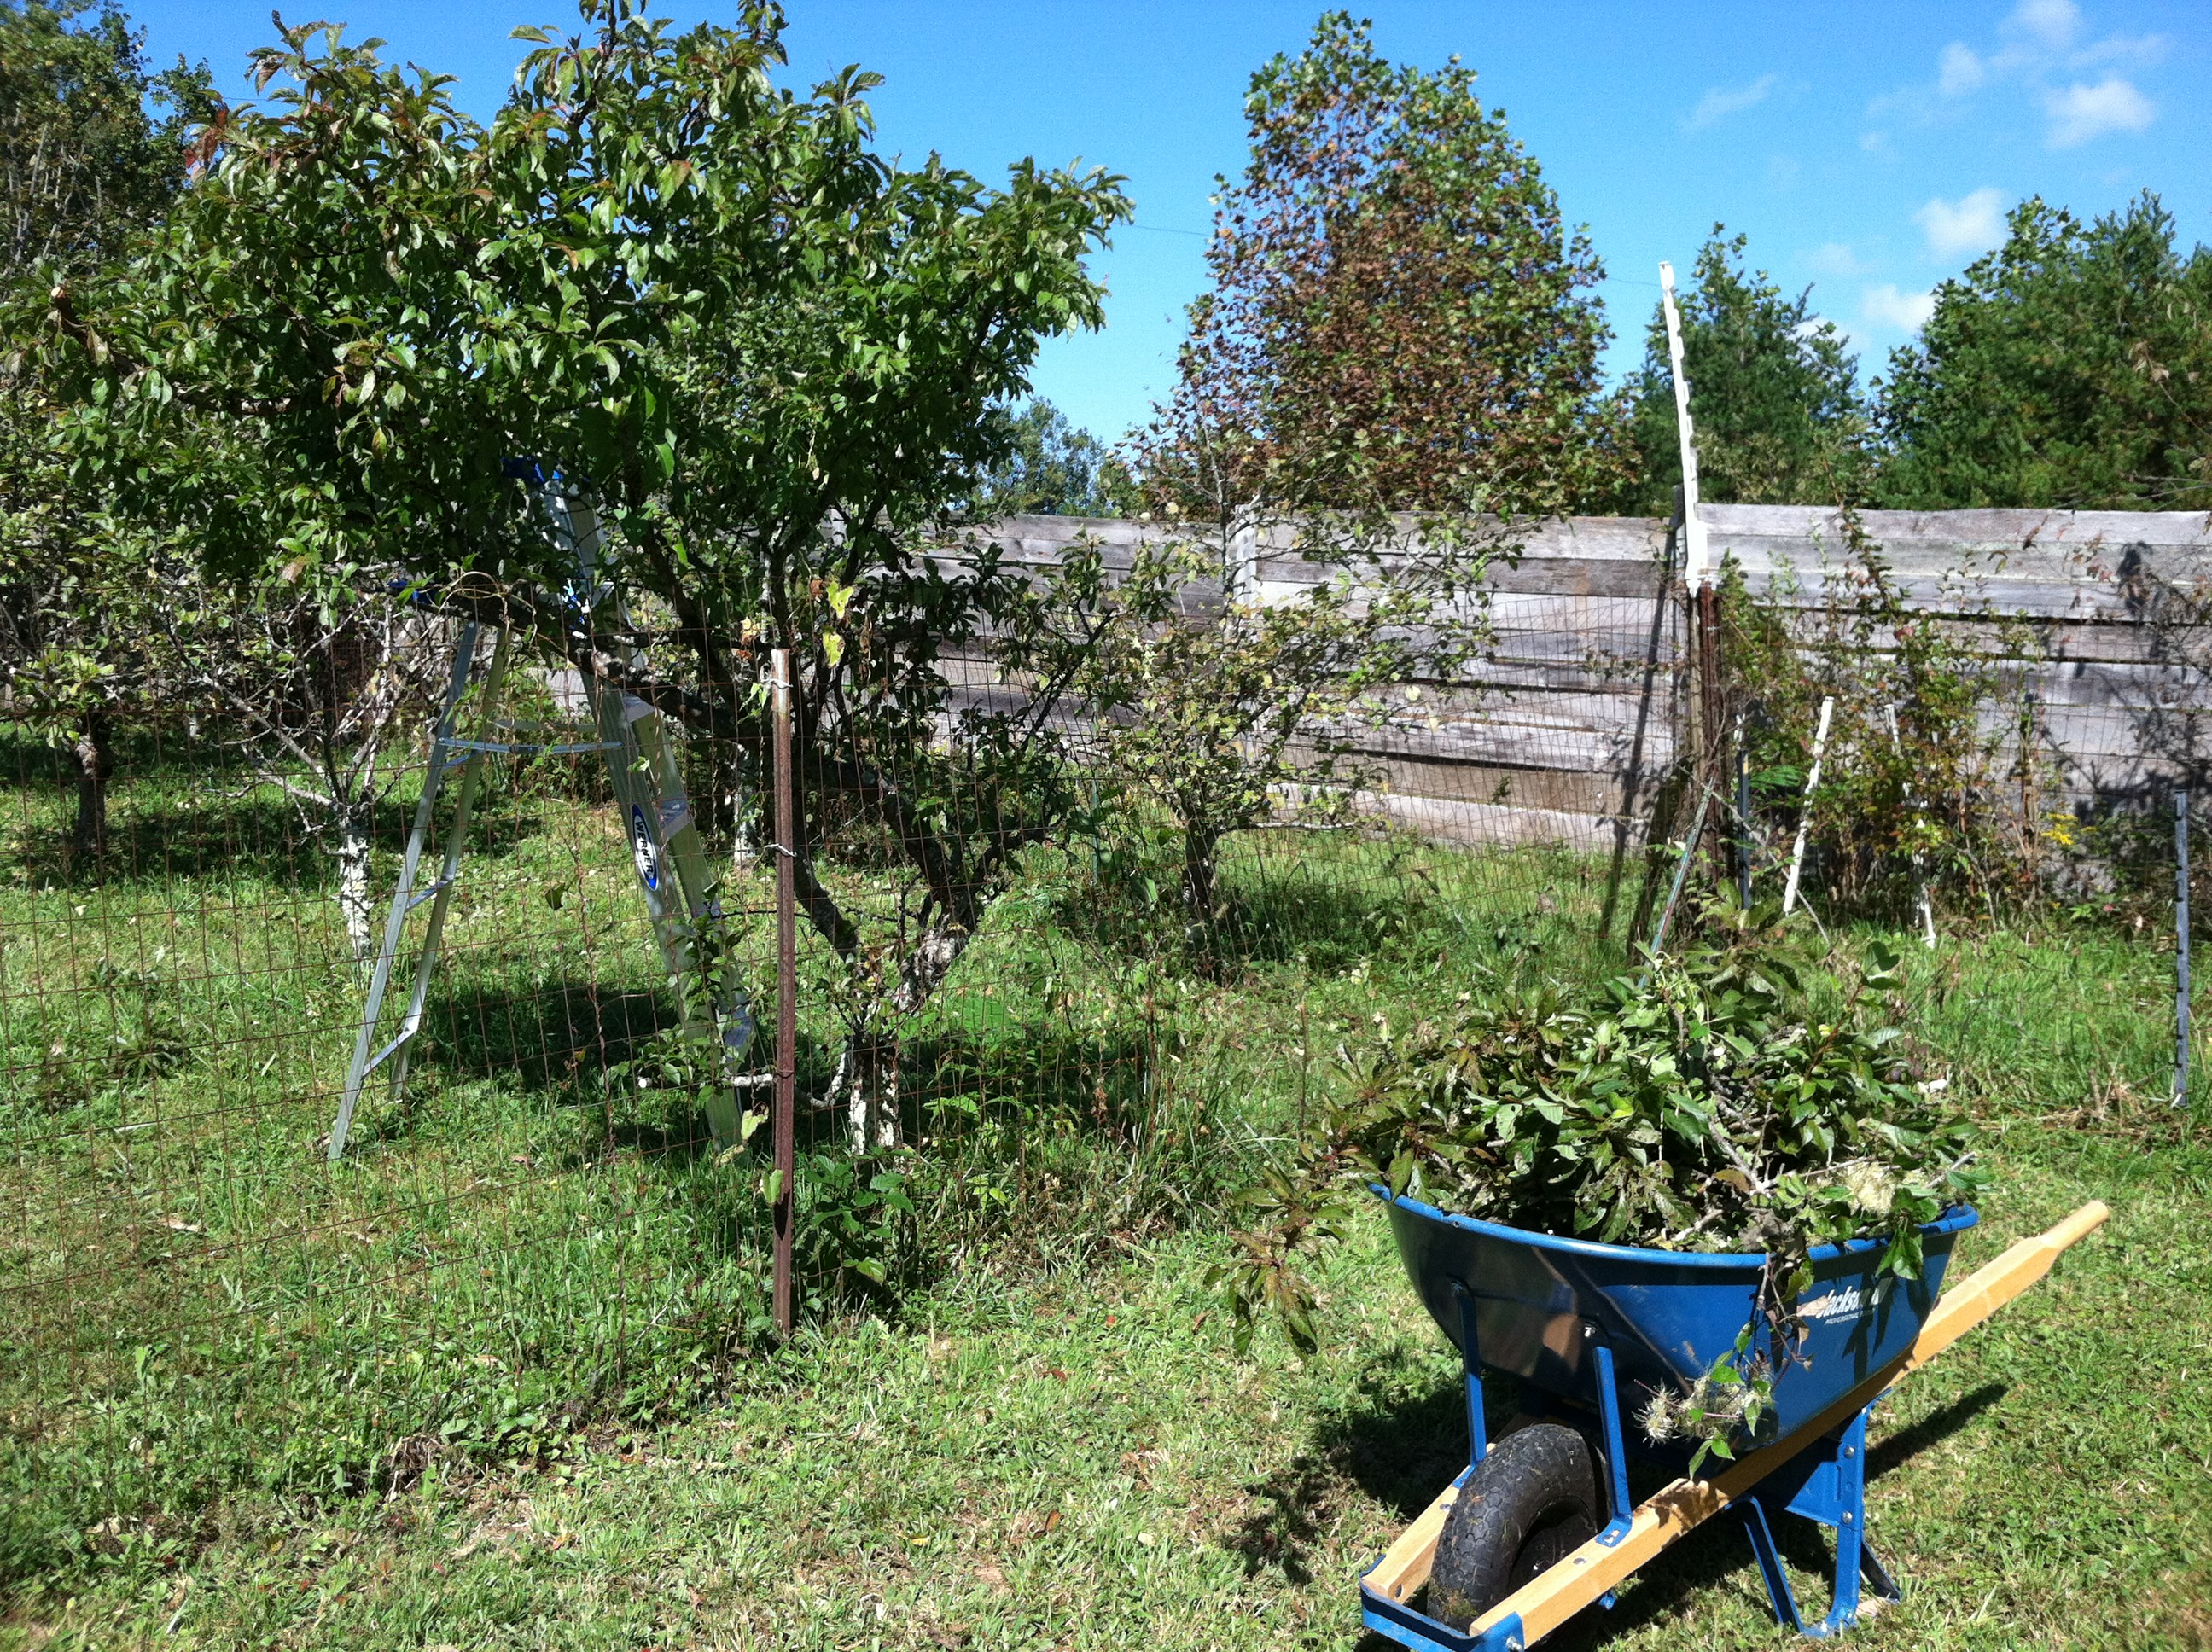
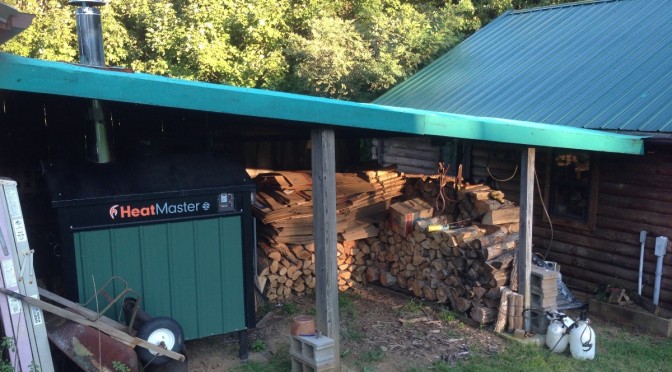
The previous owner of our mountain home installed a wood stove boiler after he built the place. If I remember correctly he said it was installed around 1998 or 1999. A few months before we first saw this place (Jan of 2013) his old wood stove boiler developed a leak and rather than try to fix the leak, a troublesome welding job at best, especially if the stove is old and on its last legs as his was, he decided just to replace it with a brand new unit. The picture above shows the stove as it was this past spring when I first fired it up.
For those who are not familiar with this type of home heating unit I shall try to explain its operation. The idea is simple really. Since many modern homes already have a central heating system with an air duct distribution system, an outside heat pump/air conditioner and an internal air handler, incorporating the wood stove boiler is a relatively easy retrofit. However, many people's air duct systems are often filled with dust and other dirty materials that clog their air distribution system, which would make fitting the wood stove boiler more difficult. However, Duct Cleaning Companies can be hired to clear dirty air ducts and clean air duct distribution systems.
The actual wood stove boiler unit is placed outside of the main home to keep the smoke, ash and noise away from the main living area. Often it is placed on a level concrete pad or just up on concrete blocks if you don't want to go to all the bother and expense of pouring cement.
The boiler itself is a firebox made of steel or stainless steel which in turn is surrounded by a water jacket of anywhere from 100 to 300 or more gallons of water depending upon the BTU output needed, which in turn is determined by the heating needs of the home/garage/business/workshop serviced by the wood stove boiler.

The wood stove boiler unit contains a circulating pump similar to those used in homes that have baseboard hot water heat fired by oil or gas. There is also a blower fan that is controlled by the on-board control unit that is programmed to turn the blower fan on and off at preset water temperatures.
The blower fan forces outside air into the firebox which stokes up the fire inside and heats the water surrounding the firebox. The firebox is usually pretty airtight when the blower is off so when the heating demand is low it is not inconceivable for the fire to go completely out. The control unit settings can be changed to fit your unique situation and each manufacturer has its own particular setup.
The outside wood stove boiler is connected to a previously installed underground (sometimes insulated) 8 to 12 inch flexible conduit which in turn is filled with two 1 inch (insulated) plastic pipes, used as the hot water feed and return piping, a power cable and sometimes a signal/control wire depending upon the manufacturer and setup. The other end of the conduit is routed into the basement either through the basement wall or floor. This varies depending upon the existing home heating unit setup.
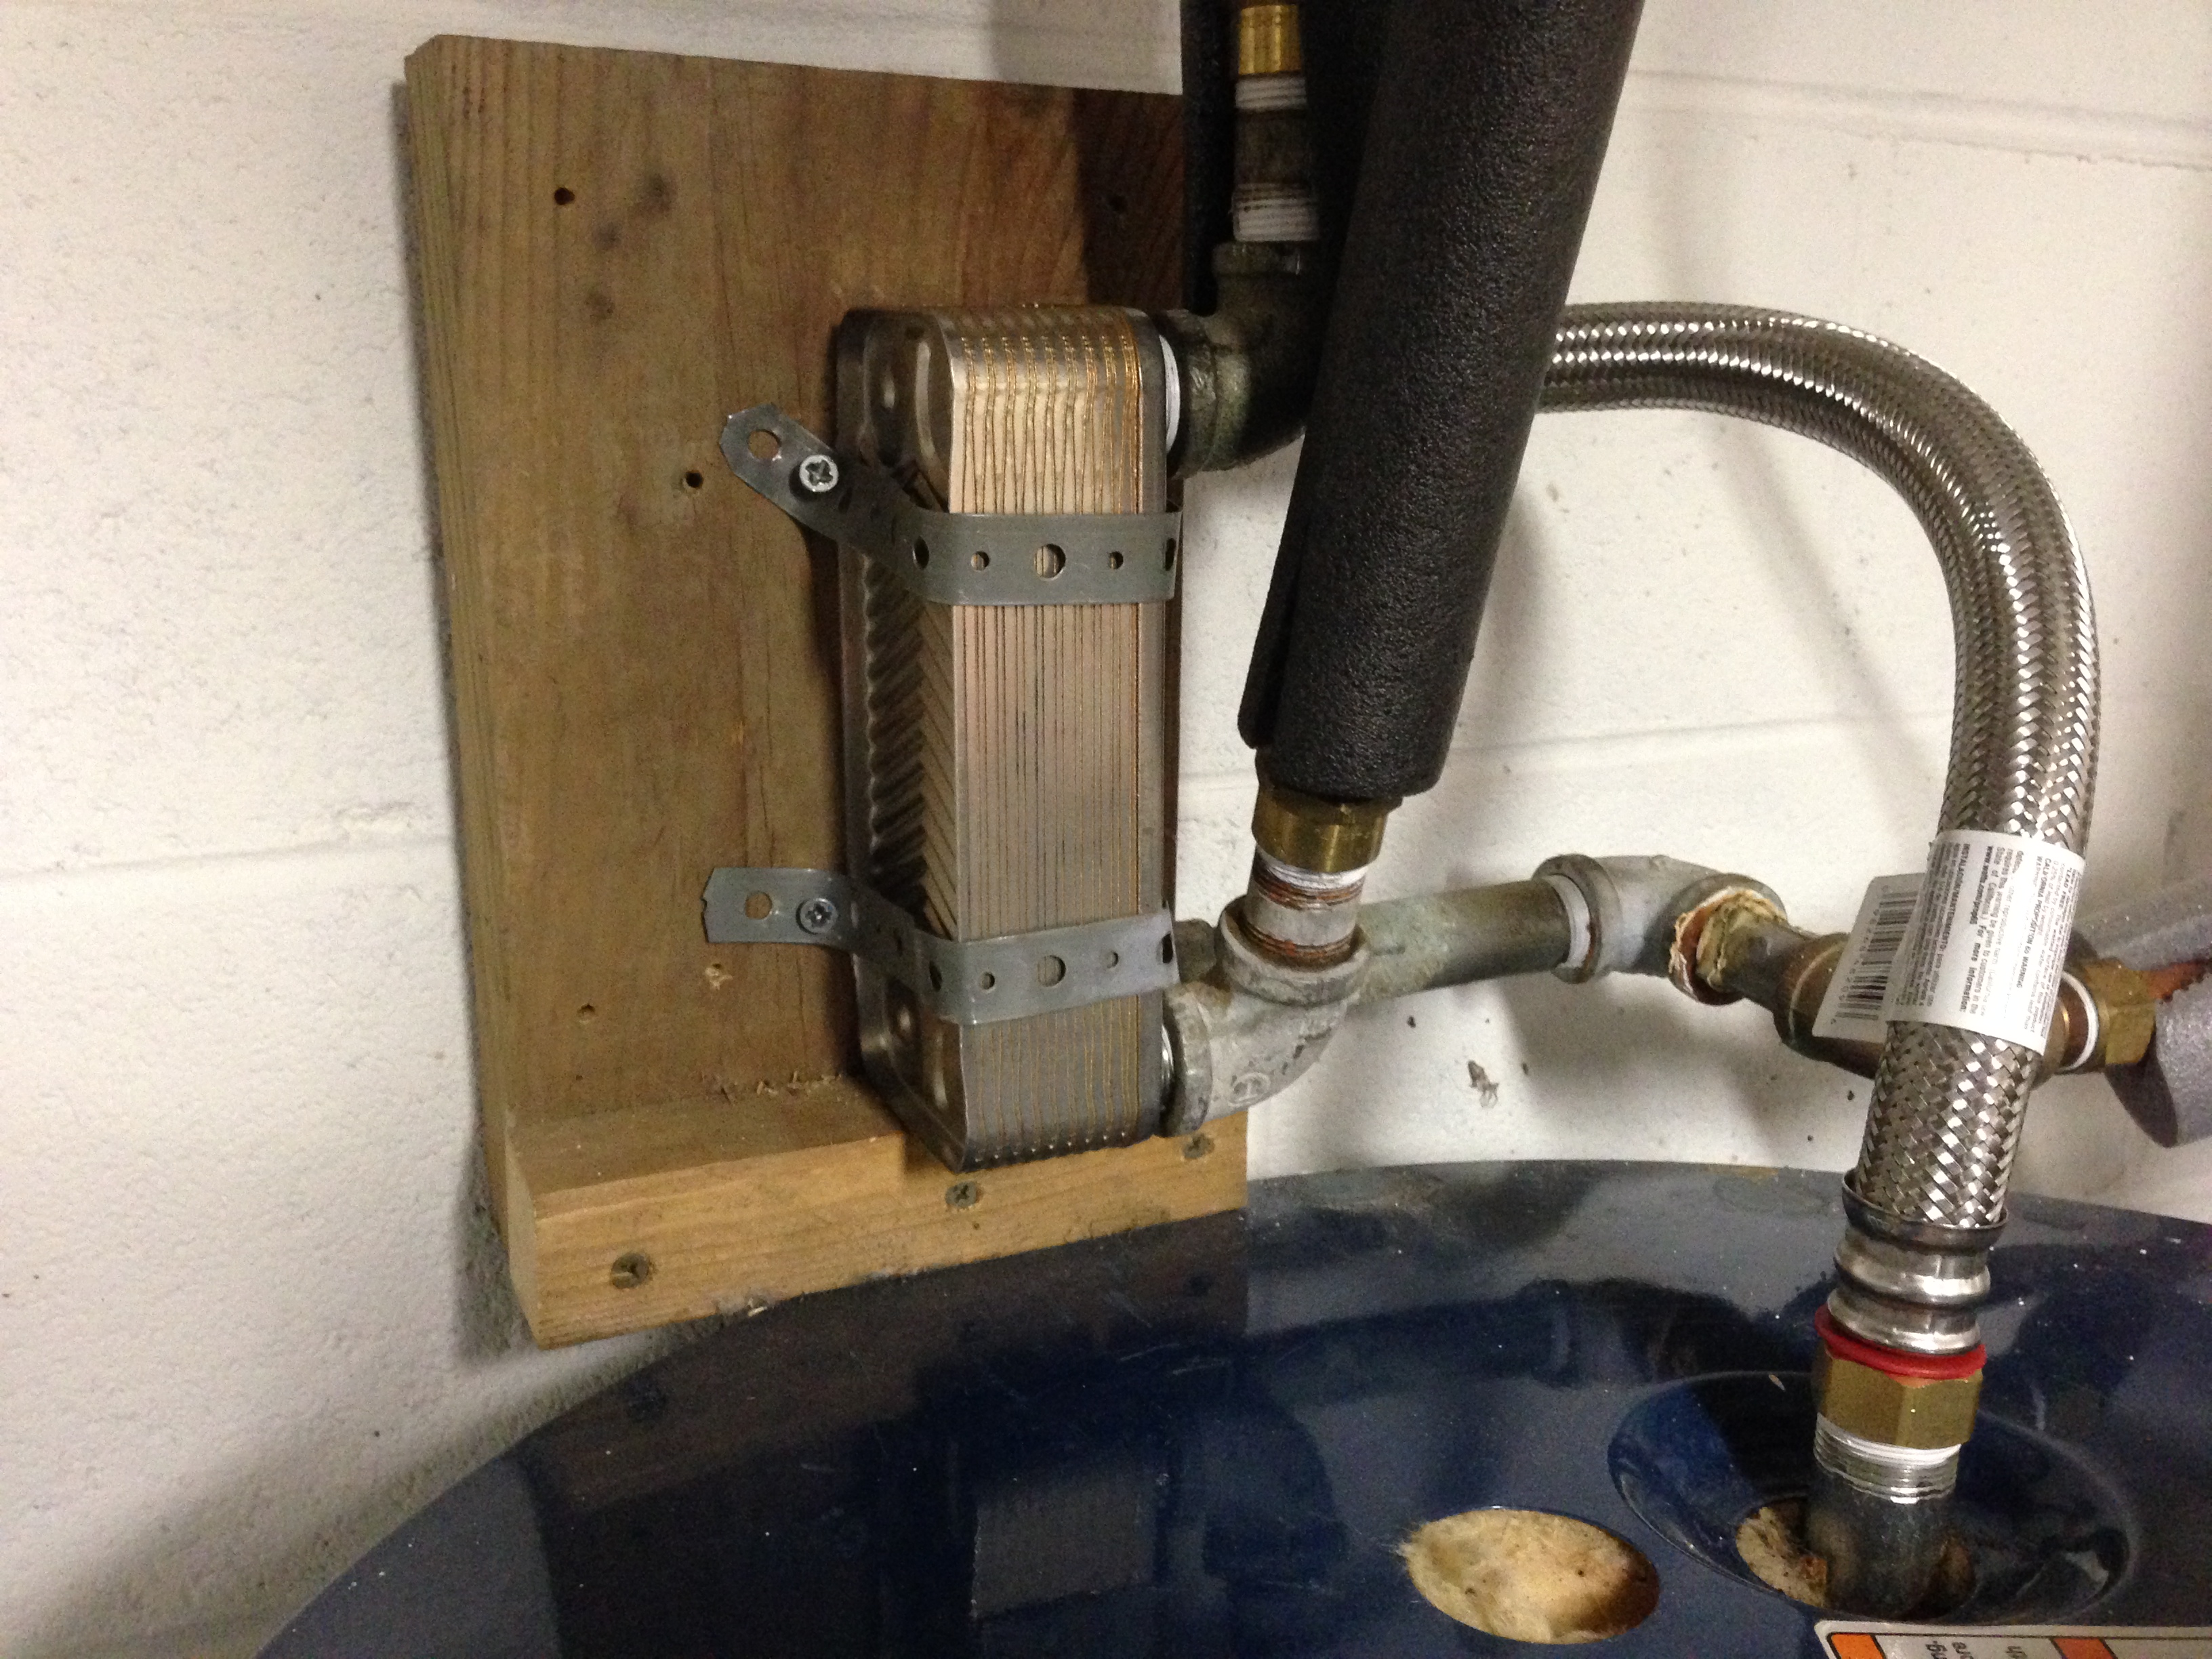
Once inside the basement the feed pipe is routed first to your existing hot water heater where the hot water from the wood stove boiler is routed through a heat exchanger before moving on to the heating system. The heat exchanger heats your domestic hot water without mixing with the hot water coming from the wood stove boiler. You simply shut off the electricity (or gas) to your hot water heater and let the boiler take over water heating duties. See the image below.
 My experience with this setup has been wonderful. Although it takes about an extra 10-15 seconds to get hot water at the kitchen or bathroom faucets and shower than using the standard hot water tank, once it starts flowing it is endless and even hotter than what was previously produced by the hot water tank.
At one point two showers were going, the dish washer was running and a load of clothes was in the washing machine and we never ran out of hot water. As long as the boiler is running you have hot water. If the boiler is not running, you may have bigger issues on your hands, such as finding out the Installing a boiler cost, as you may need a new boiler altogether.
From this point the boiler hot water feed runs over to your air handler unit. Here it is a bit more tricky because essentially an additional (much larger) heat exchanger must be inserted into the duct work coming out of the existing air handler. Usually there is enough room to do this, but it can be a tight fit.
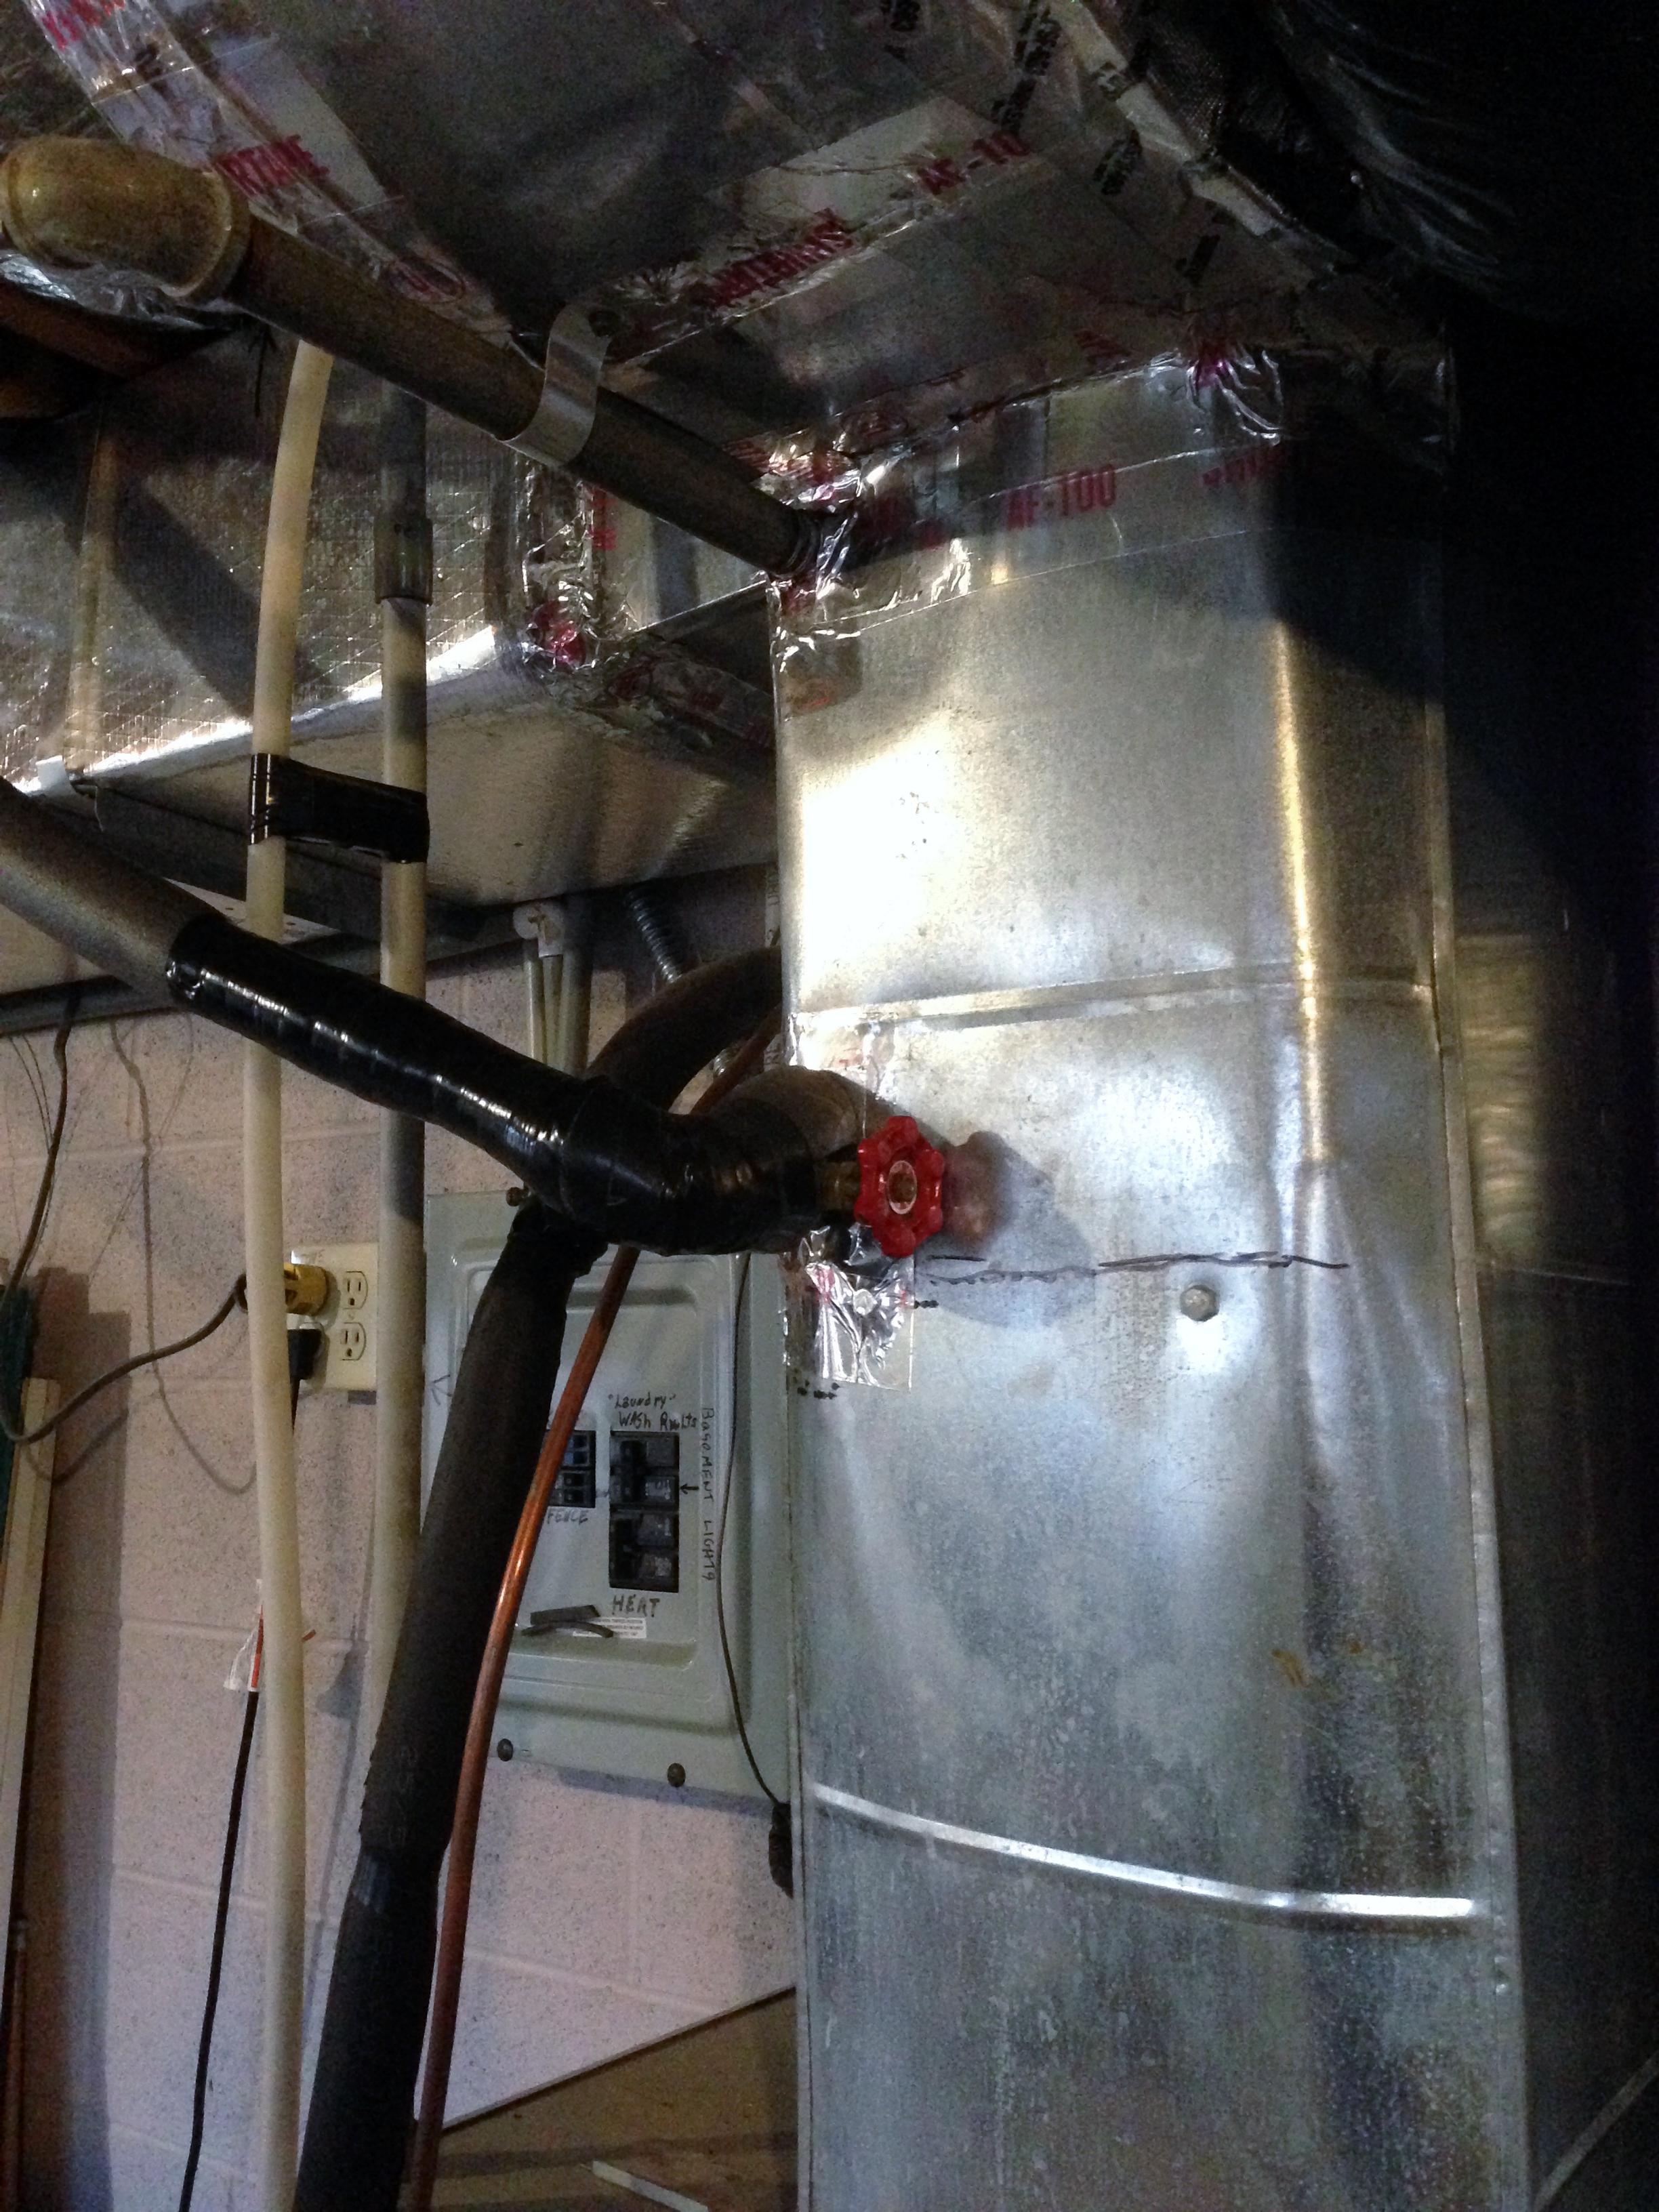
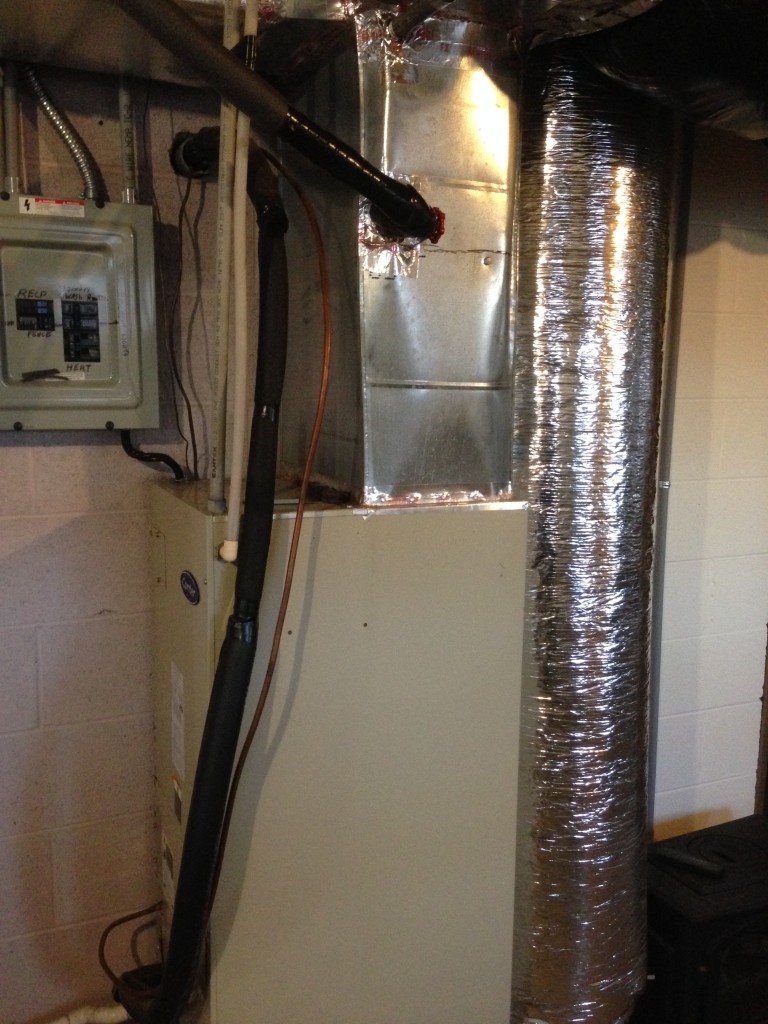
Below is an image of the house air handler and the feed duct work coming out of the top. The long round flexible silver duct work to the right is the air return. To the extreme left is an electrical sub panel that I discuss on the standby generator page. The thick black insulated piping running from the top of the concrete block wall to the bottom of the air handler is the feed and return coming from the heat pump/air conditioner. The slightly thicker black insulated pipe running from the top left of the image into the square silver duct work is coming from the wood stove boiler via the domestic hot water heater previously discussed.
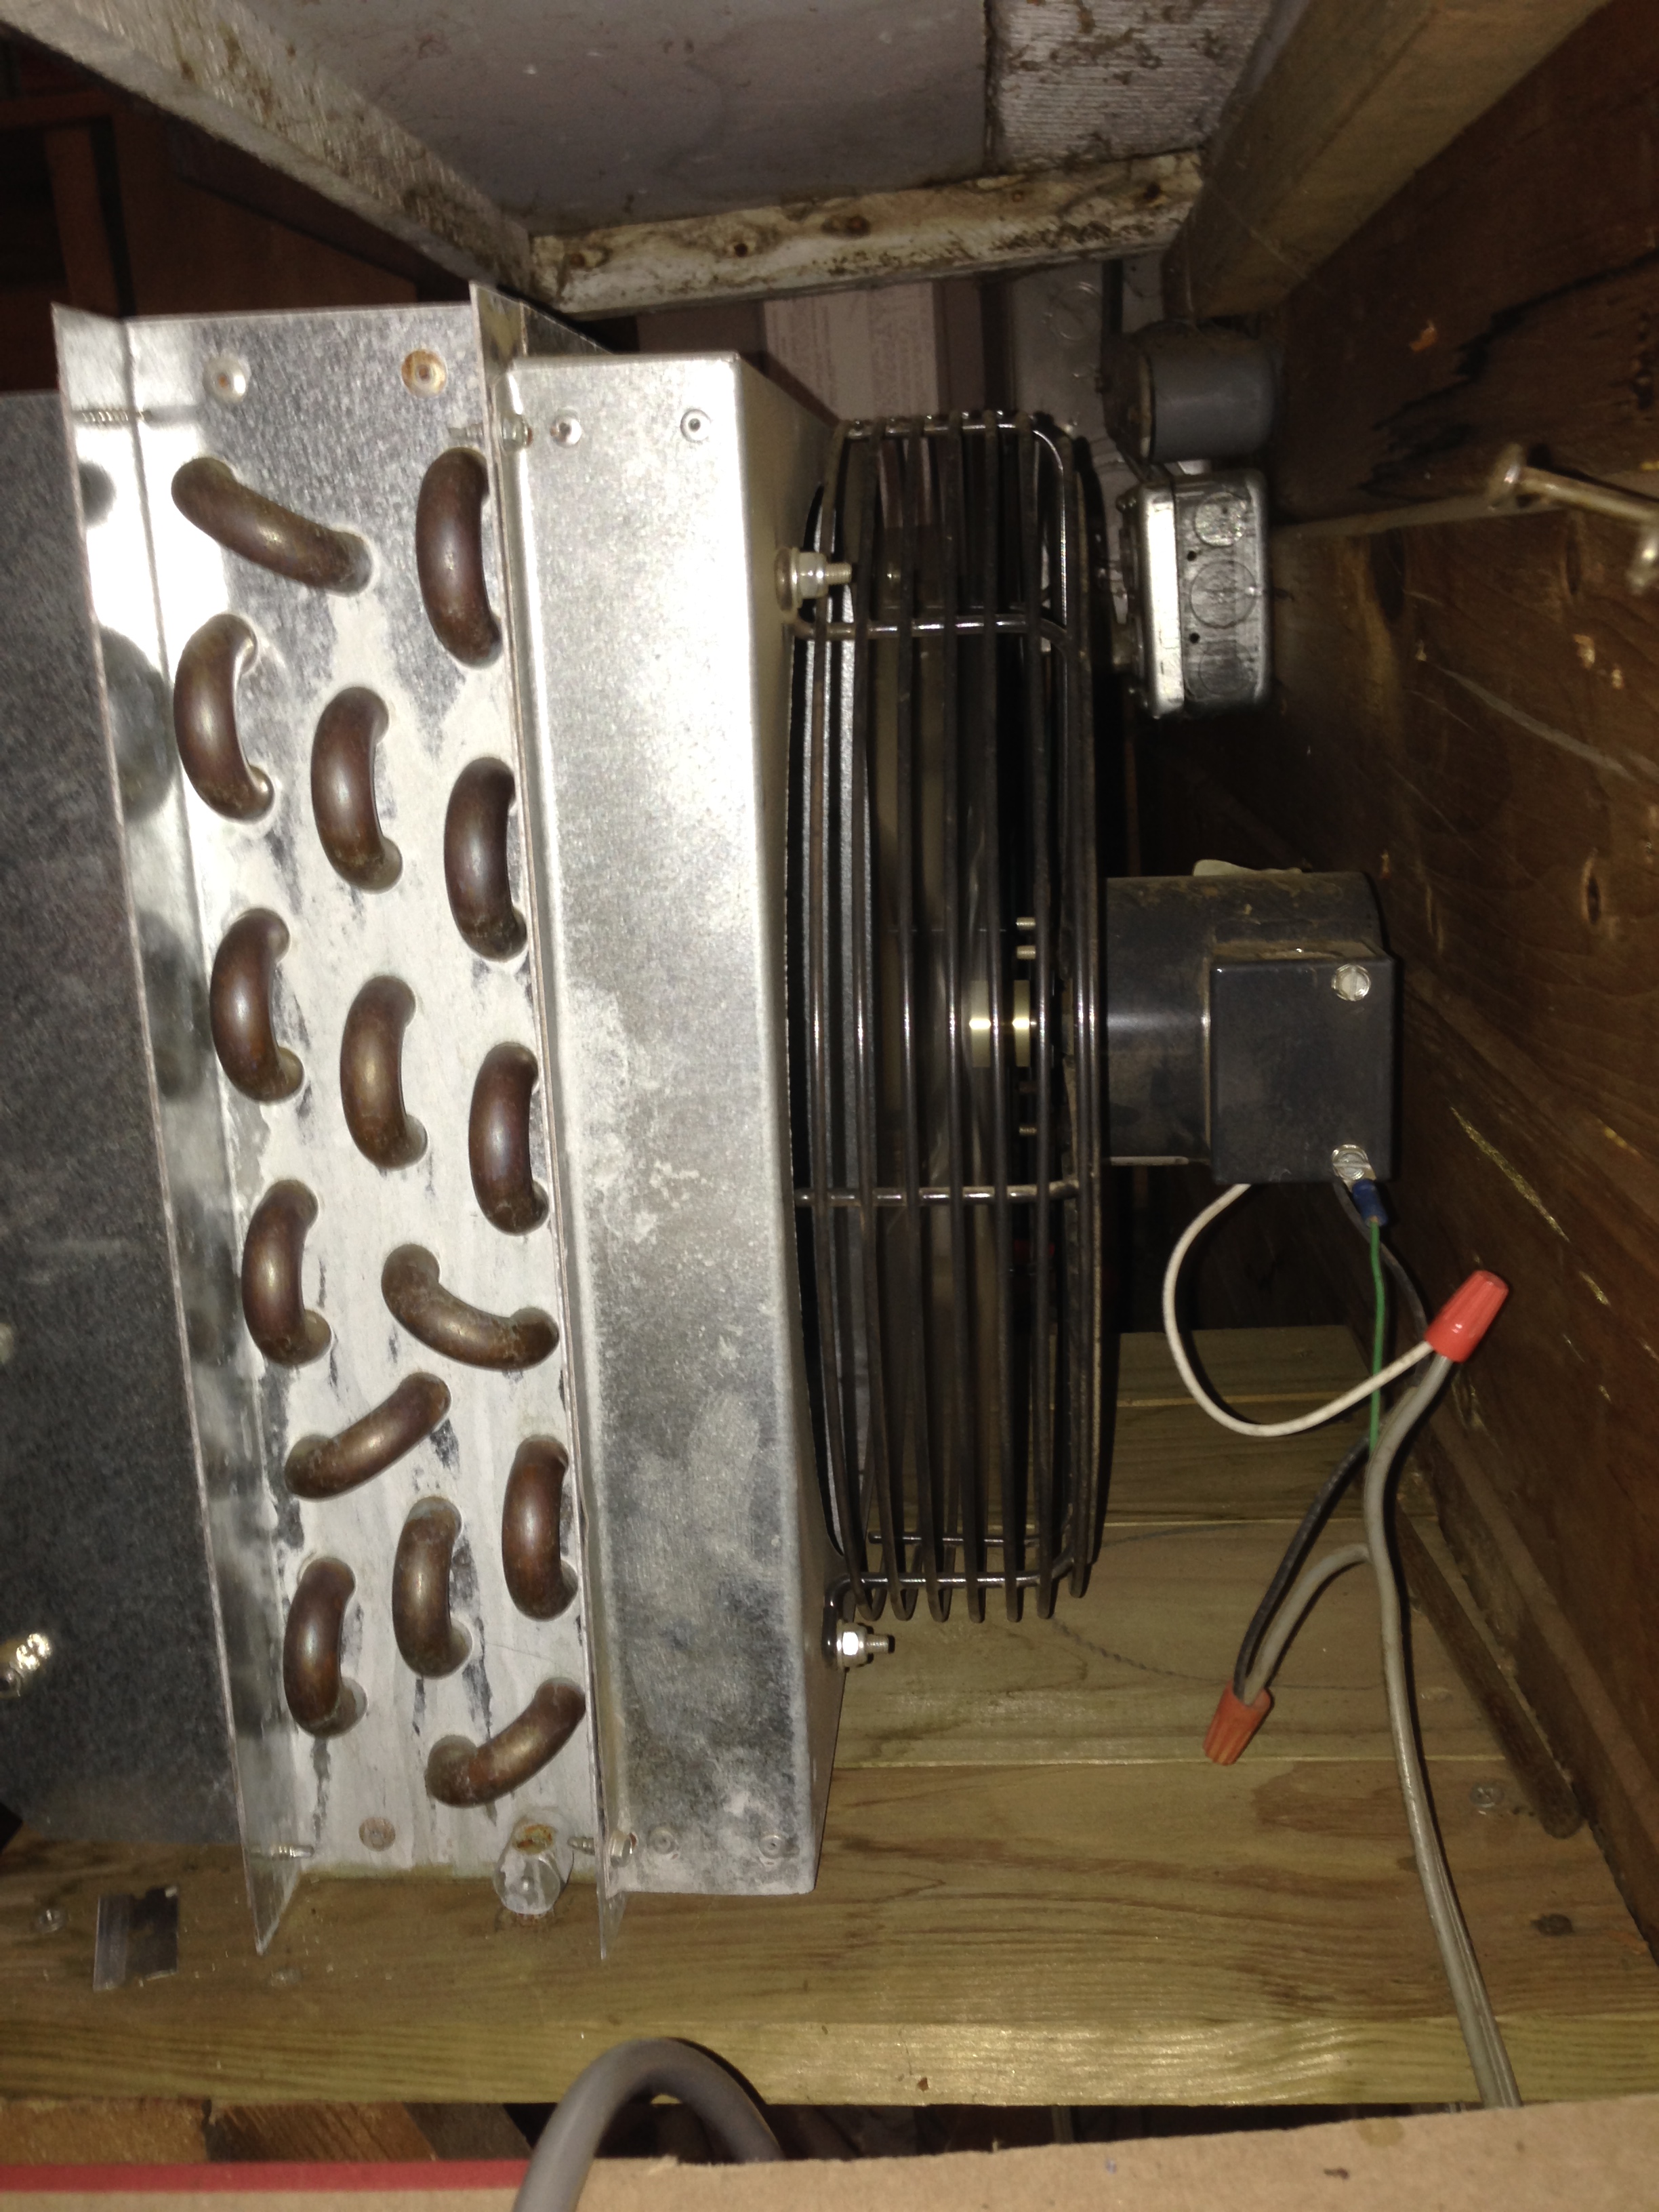
 The wood stove boiler heat exchanger is shoehorned into the duck work above the air handler. In the close up below you can see that they actually bent some of the duct work to accommodate the heat exchanger. I have seen two other installations since moving here and they all look a little iffy, but they work which is all that counts. Sometimes you need to put 10 lbs of potatoes in a 5 pound sack.
You can also see the cast iron feed pipe coming in at the top and the return exiting the bottom which is then routed back outside via the same place it came in. The close up from a different angle shows in better detail the bulging duck work and the main house air duct work feed runs up top.
While it isn't the prettiest installation it works perfectly and that's all that counts. If it were a new installation the air handler would be sized to properly accommodate the additional heat exchanger. In fact there are now name brand factory built air handlers already made to accommodate the additional wood stove heat exchanger. These manufacturers are working directly with major wood stove boiler manufacturers to create an efficient heat exchange system.
 But the round trip doesn't end quite yet back at the wood stove boiler, at least not with my setup. The Heatmaster 5000 is located between a 12 x 12 log outbuilding currently used for storage and a 22 x 24 garage/workshop. The previous owner wanted heat in the workshop so he routed the hot water return from the air handler inside the basement out to the workshop and into its own heat exchanger to squeeze out the last bit of heat before finally returning to the boiler.
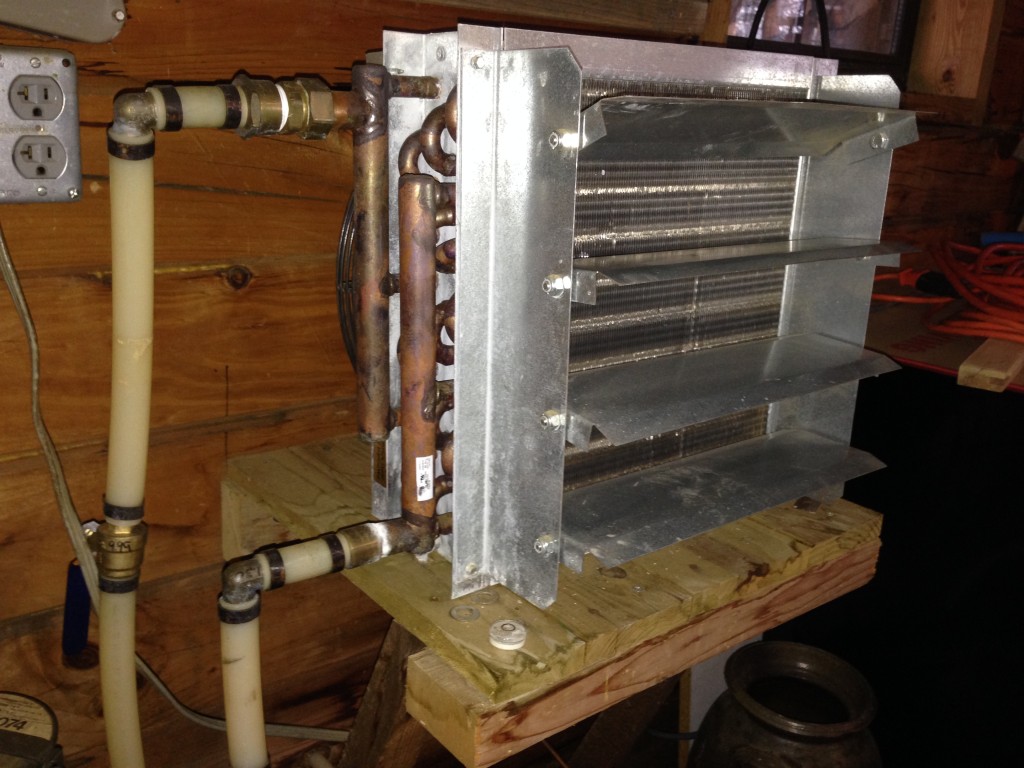
Here there is no duct work, just the heat exchanger sitting on a little wood shelf with a fan attached to the backside. Presently it is hooked up directly to one of the circuit breakers in the garage sub-panel and is turned on and off by flipping the breaker. I plan on installing a thermostat plus an on-off switch to add some flexibility to the system. It's a bit noisy but I just turn the music up and ignore it. It sure is nice having a heated garage/workshop to putter around in.
If you look closely at the two images below you can see that the vanes in front are adjustable and the side view shows the copper tubing of the heat exchanger. Again, not really pretty but it works great. I have been consistently surprised how much heat is still left in the hot water after going through the domestic hot water heater and the air handler heat exchanger, plus the total round trip of easily 200 feet.

The nice thing about the system is that you now have a one inch pipe running into the house that is connected to an almost unlimited source of 170 degree (plus or minus) hot water. This temperature is oftentimes hotter than what your existing heat pump can produce at the heat exchanger and the only electricity being used with the wood stove boiler is for the blower fan when on and the water circulation pump plus a tiny amount for the control unit.
The best part is that the efficacy of the standard heat pump degrades rapidly once outside temperatures drop into the teens. At that point expensive-to-run supplementary or emergency heating units kick on and take over the heat producing burden that the heat pump can no longer provide.
When that happens think heating you house with a giant hair dryer and you quickly understand how expensive that can get when the outside temps drop. With the wood stove boiler the hot water is constantly circulating so it's just a matter of running the air handler for as long as it takes to maintain inside temperature.
The key to running the system is to never disconnect the power to the air handler system, which also powers the home thermostat. All you do is pull the circuit breaker/disconnect to the heat pump itself. This prevents the heat pump from kicking on when the inside thermostat calls for heat. But the thermostat still signals the air handler to turn on which moves air up through the duct work where the wood stove boiler heat exchanger resides, heating the air before it is distributed throughout the house.
Because the boiler hot water circulating pump out at the boiler is running constantly, regardless of whether the inside air handler is operating or the boiler blower fan is running, there is a constant supply of hot water running through the heating system. When the thermostat calls for heat it is instantly on just like the heat pump provides.
When you wish to run the heating system in heat pump mode you simply shut down the Heatmaster 5000 and flip the circuit breaker for the heat pump back on. Now the heat pump will supply heat for the air handler rather than the Heatmaster.
Some Issues With The System
I have been having creosote buildup issues with the Heatmaster 5000. Some of it comes from burning wood that has not been fully seasoned, though the stove is designed to be very efficient and it is designed to combat creosote.
I think some of it is because the boiler is too large for the system itself. The '5000' in Heatmaster 5000 means it is intended to heat a home of 5000 square feet with a boiler that is designed to produce 250,000 BTU. We have less than half that amount of square footage including the garage.
I suspect that the stove gets the water jacket temperature up to the blower shutdown temperature quickly, shutting down the burn inside the firebox. Thus the firebox never has a chance to linger at full temp and burn off some of the residual creosote. It is similar to a high powered car engine being used for trips down to the mall and back and never being run at the temperatures and speeds it was intended and designed for. Carbon quickly begins to build up and the engine runs rough and inefficient.
In fact the Heatmaster 5000 is designed for a two zone heating system and has two circulating pumps to feed two heat exchangers which allows for independent heating of the first and second floor of a much larger house. I suspect the previous owner felt that if the Heatmaster 3000 (which is more suited for our home) was good than the Heatmaster 5000 must be even better. I never asked him why he bought the 5000 and don't intend to do so.
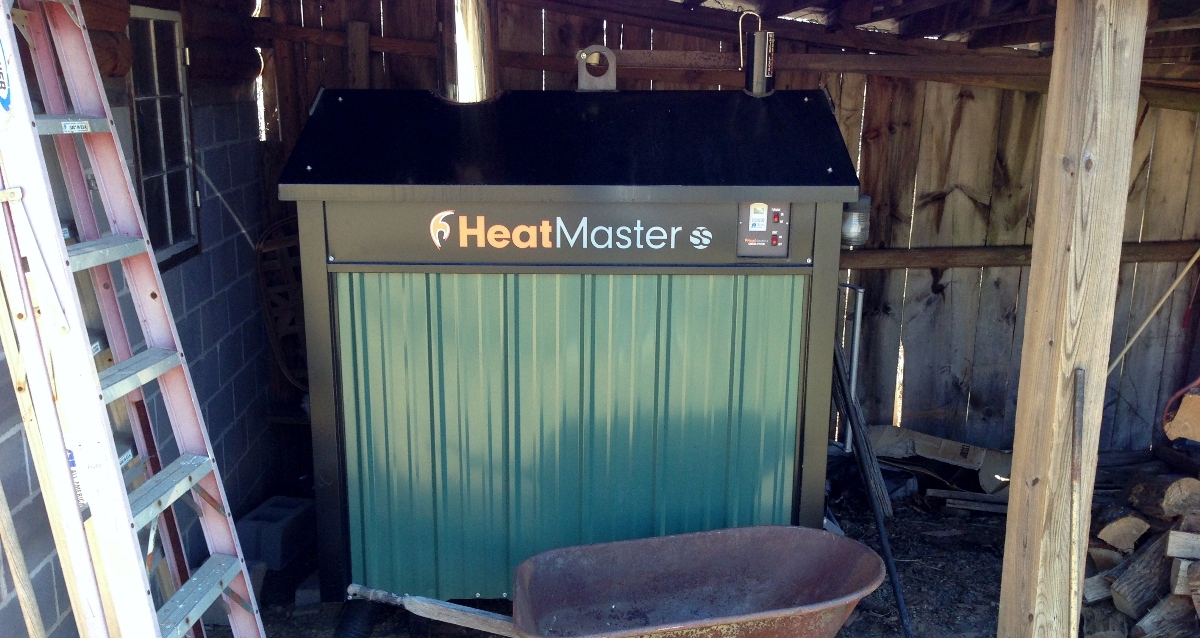
The second possible cause of the creosote buildup might be simpler to fix, but I might not do so. All Heatmaster units are designed to be placed outdoors in the elements. They can be rained/snowed/sleeted on and work perfectly. Everything vital is enclosed or waterproofed so there is no need for overhead cover. The Heatmaster comes with a zero clearance chimney that sticks out about 18-24 inches from the top and that is all that is needed to exhaust the waste gases.
If you examine the image all the way to the top of this article you can see that the Heatmaster is located under the cover of a roof that spans the distance between the smaller outbuilding and the garage/workshop. This is great because it offer shelter for both the wood and the operator during bad weather. But it required two extensions to be added to the chimney.
My research indicates that doing this can and does cause a faster buildup of clogging creosote in the Heatmaster and the company warns against adding to the chimney if not needed. If I removed the roof over the Heatmaster that just puts the lowered chimney below the roof that remains over the operator and wood. That might make for lots of smoke eating on my part. And I don't want to abandon entirely the cover.
I'm not complaining because we have a great system that is brand new and will last for many years. The work-around for this winter is two fold. I have removed one exhaust baffle from the top of the firebox which allows the smoke more direct access to the chimney. The downside is that the boiler is less efficient this way. But when the chimney is (partially) clogged the stove is even less efficient so I'm doing no worse, and in my opinion much better, with the baffle removed and the stove running well.
The second work around is that every three or four days I leave the firebox door and lower vent open, shut off the blower, and get the fire super hot and let it run past when the blower would normally shut down. This gets all surfaces hotter, including the remaining exhaust baffle and the chimney itself, than it would get if I did not do this and helps burn off the gummy creosote. I'll work on more permanent solutions when after I have shut the system down in the spring.
That's my alternative heating system. If you're interested in getting a new boiler, check out rhi payments to make getting a new boiler, more affordable. Comments, suggestions, feedback? Let me know what's on your mind.
Cognitive Dissonance
 Things I look in a wheelbarrow are as follows.