
From Mrs. Cog's Corner
Move over Campbell’s, I am now and forever more ruined and must insist upon fresh tomato soup. As I am racing to process tomatoes faster than the garden produces them, this week I took a day to try my hand at an old childhood favorite. Not only did it turn out well, unlike a few recent domestic disasters, but I was able to use several of my new kitchen toys to get the job done.
I used a number of different types of tomatoes for the task, the only requirement was each one be healthy and ripe. After cleaning 6 flat boxes (as shown in the photo above) of ripe tomatoes, I cut out the tops and sliced them into half, quarters or eighths depending upon their size.
With my new Victorio Food Strainer secured to the counter top, I began cranking. This machine magically separates the seeds and skins from the juice and pulp. It reminded me of the play dough plastic spaghetti making machine we used as children. What fun! Filling the hopper half full with tomatoes, then squishing and cranking, I emptied the juice and pulp bowl into the big kettle (Pop’s Pot) every time it became more than half full.
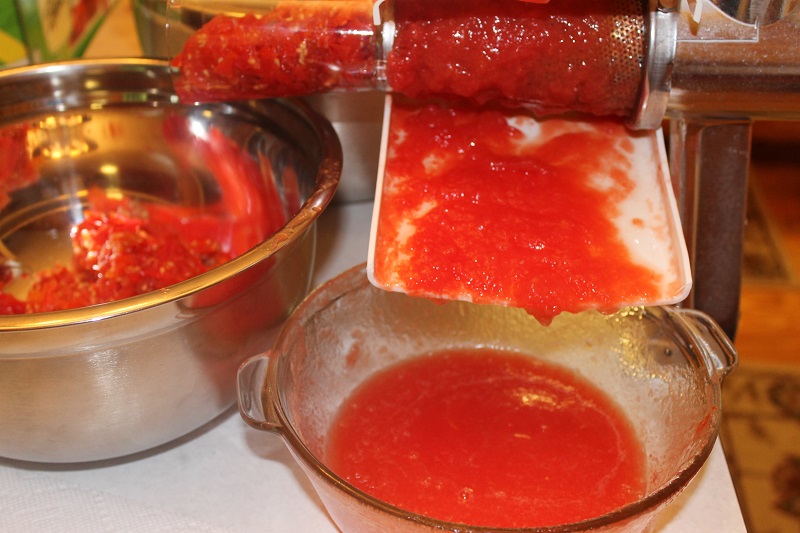
When I was finished straining the tomatoes there was more than 3 gallons of puree in the kettle. I took the opportunity to hose down the counters and wash the equipment as the longer it all sat, the stickier it became.
Next I broke out the instructions for my new food processor. I have never owned one before and after using it I’m not sure how I made it this far in life without one. Better late than never. This was one of those purchases where Cog was looking over my shoulder as I watched YouTube videos on how to make tomato concoctions and he began researching through Consumer Reports to find just the right one. Before I knew it, he had ordered me this.
After reading the how-to’s and do-not’s I proceeded forward with great confidence. Again, what fun. First I pureed several onions from the garden. No tears! Next after cutting it into large chunks I pureed a whole bunch of celery. As these liquified garden vegetables were created I added each to Pop’s Pot, which was now simmering on the stove.
I added a cup of white sugar (some recipes call for brown sugar, some white), 4 Tablespoons of canning salt and a few shakes of ground cloves. Bringing this to a gentle boil, I decided it passed the taste test. (Perhaps a tad more sugar next time?)
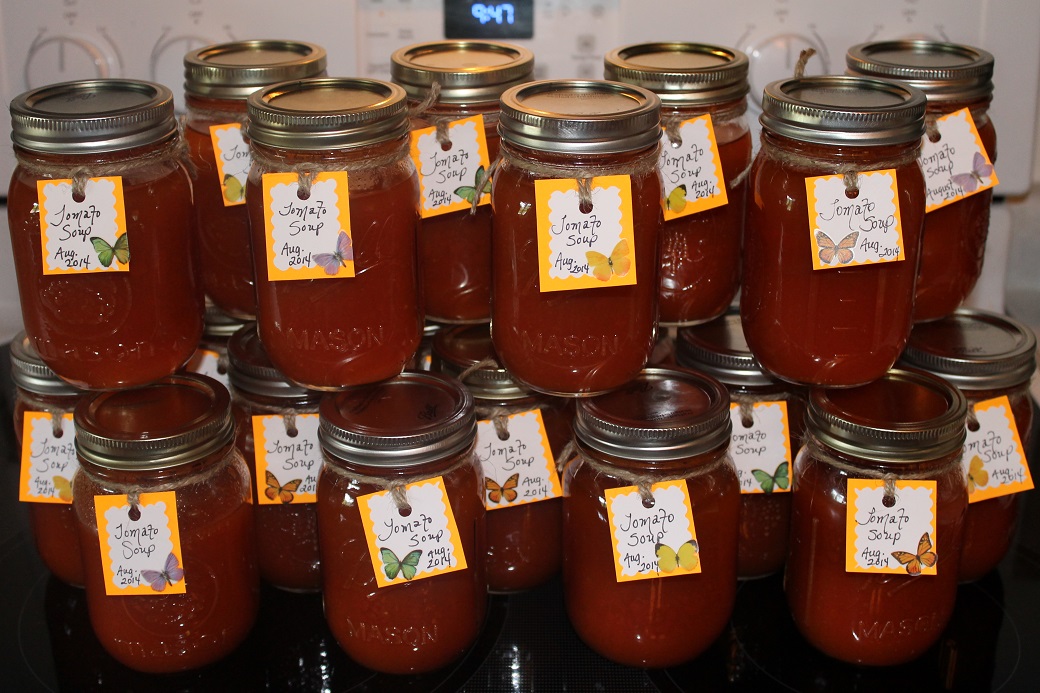
This recipe made 22 pints of soup. As it contained low acid vegetables such as onions and celery, it required 40 minutes of processing in a pressure canner once the gauge reached the appropriate pressure for my altitude.
As an added bonus Cog decided my staying up until wee hours to continue processing extra batches of chili in the canner had gone on long enough. This past week he duplicated my pressure canning set up, as described in my Chili is a Gateway Drug article, and bought another ceramic burner and 23 quart Presto pressure canner so I could run them in stereo when my batches were large enough to warrant. As you can see in this image below of the corn being processed, I needed to run the two pressure canners on different electrical circuits. So I located them on either side of the new kitchen setup.
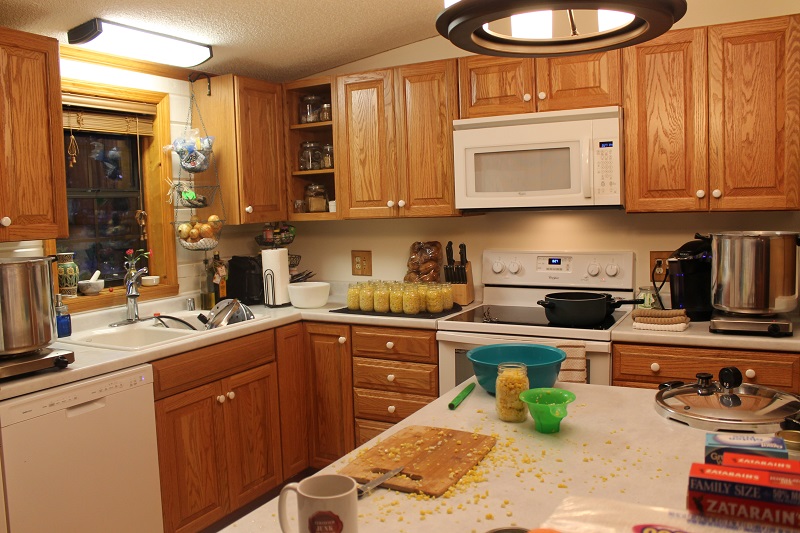
I had to wonder if the laws of physics differed from one side of our kitchen to the other. Why would two of the exact same products filled with identical contents and turned up to the same setting at the same time reach the desired pressure at different rates? Always thinking out of the box, Cog surmised the amount of heat given off by the ceramic burners differed slightly, enough to cause the difference resulting in the two canners reaching their targeted pressure at different times.
Pressure Canning Tip: Food safety rules state that flour and butter/dairy products should not be included in recipes for items that are canned by either water bath canning or pressure canning. While these methods do make foods safe for long term shelf life, they are unable to kill food borne pathogens which hide in and can survive within flour or dairy ingredients. For that reason, to err on the side of caution, I have left out the roux for the tomato soup recipe.

A roux is simply a thickening agent, in this case to make your tomato soup creamy. It is equal parts butter and flour. A tablespoon of each of these can be quickly whisked together in a sauce pan before adding a jar of tomato soup to heat up and in minutes you have creamy homemade soup. I have substituted gluten free tapioca flour for all purpose and it works fine.
Do you have a variation to this recipe? We'd love to hear from you.
Yea! Zucchini free food! ;p Ok, that’s enough out of you Mister!
It’s been a long time since I was around or involved with any sort of canning process…but I’m just poking my hand up here(very tentatively) to wonder if you might be able to use a product called Clear Jel in place of flour as a thickener in your canned tomato soup prior to canning. It’s a modified corn starch. Here’s some more info here:
http://spock.fcs.uga.edu/ext/pubs/fdns/FDNS-E-116.pdf
I’m not sure though if it was just designed for pie fillings, or if it would work in your tomato soup canning recipe. Some say no for anything like that for tomato products, others say it’s ok. I really dunno… I even saw a suggestion of using potatoes in place of flour for thickening…and dried products(dried onions, dried peppers, etc.). But the latter was more for salsa, with the idea being that the dried products soak up more of the juices/water thereby serving as a thickener.
I guess your way of thickening it later, when you open the jar to serve it, is probably the best option.