A Step By Step Guide To Setting Up Your Own System
By
The Urban Pepper
I could only read so many articles about GMO processed foods, hidden inflation, just in time inventory systems and worldwide droughts before I came to the conclusion something was very wrong. In my opinion there are massive problems coming down the road and after much consideration it seemed the only logical thing to do was to start a garden and change myself. Easier said than done and I’m not there yet. But I progress step by step and one day at a time.
The garden is a big part of my life now and I spend a great deal of time tending to it. I gave up TV, fast food (90%, not there yet) and I gave up drinking. What I do now makes me a happier person. Gardening has helped teach me patience and a love for all things.
If you want to get to know your neighbors better I highly recommend starting a garden. Having done so I now know all my neighbors by name and most of them have gardens as well. A new neighbor was walking his dog past my house and stopped to comment on my garden. We introduced ourselves and I gave him a couple of pepper starter plants. So gardens are a great conversation starter as well as common ground to build upon your local community.
After gardening for three years, mostly in containers and raised beds, I came across a video about Dutch water bucket systems and I was impressed. They were named "Dutch" because you build the system yourself. You can buy them ready-made for about $15 or you can build them for about $9 each.
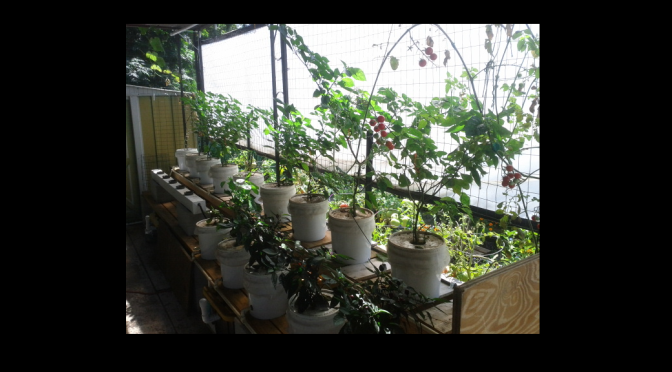
The system is expandable so you can start off with just a few and add more at any time. I started with five on a covered porch that gets very little direct sun light. By building them myself I developed a better understanding of how and why they work so well.
Please note that the system must be installed under cover to prevent the rain from diluting the nutrient solution and it is best if the covered area is facing the sun.
Two gallon buckets and lids can be purchased at Lowe’s or Home Depot. You may be able to acquire some for free at local restaurants where they often discard them. It’s recommended that the buckets be darker in color to keep the algae manageable. The buckets I used last year are white and and they were fine.
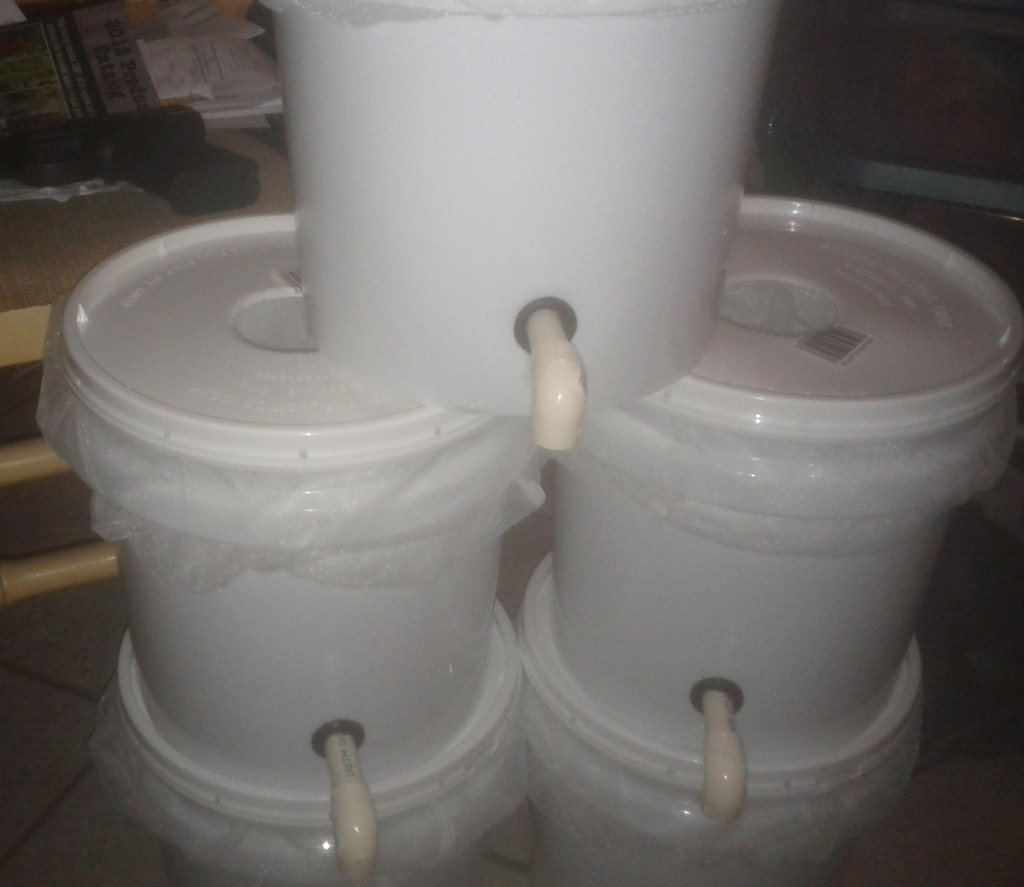
Drill a hole about two inches from the bottom of the bucket to accommodate a 5/8’s Inside Diameter (ID) rubber grommet. This will provide a sealed hole for a 3 inch long ½ inch CVPC (plastic) tube. Insert the tube through the grommet hole so half is in the bucket and half is outside the bucket. Attach two 90° elbows of ½ inch CVPC, one on each end of the tube, both facing down.
Cut a 3 or 4 inch hole in the bucket lid and cut a slit from one side to the other of the lid with the hole in the middle. This will allow you to maneuver the plant through the hole and slit in the lid later. You will also need a 5 gallon paint strainer net. This is used to contain the Perlite as explained below. Place this strainer net inside the bucket, then put the modified lid on the bucket. The plastic elbow inside should be on the underside of the net. They should look like this when completed.
Once the buckets are done, it is time to create the water reservoir. I used a 27 gallon plastic storage tote, approximate cost of $10 at Lowe’s or $8 at Costco. The tote will house the water pump ($15), nutrient solution and air stone ($15). I prefer to use this type of tote (see image below) because it is easy to drill through. Place the pump in the bottom of the tote and drill a hole in the lid to accommodate the hose from the pump near the backside. Drill another hole for the power cord. Only one pump and tote is needed to feed up to 10 buckets.
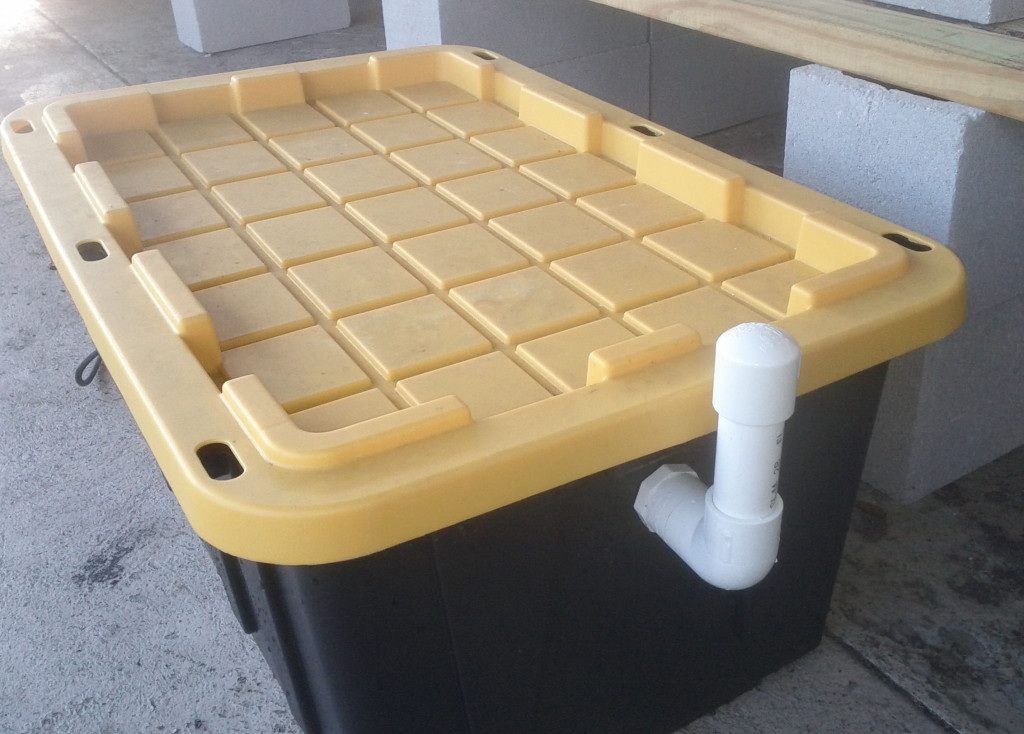 Tote with fill hole and pipe installed to allow for nutrient water replenishment without removing the cover
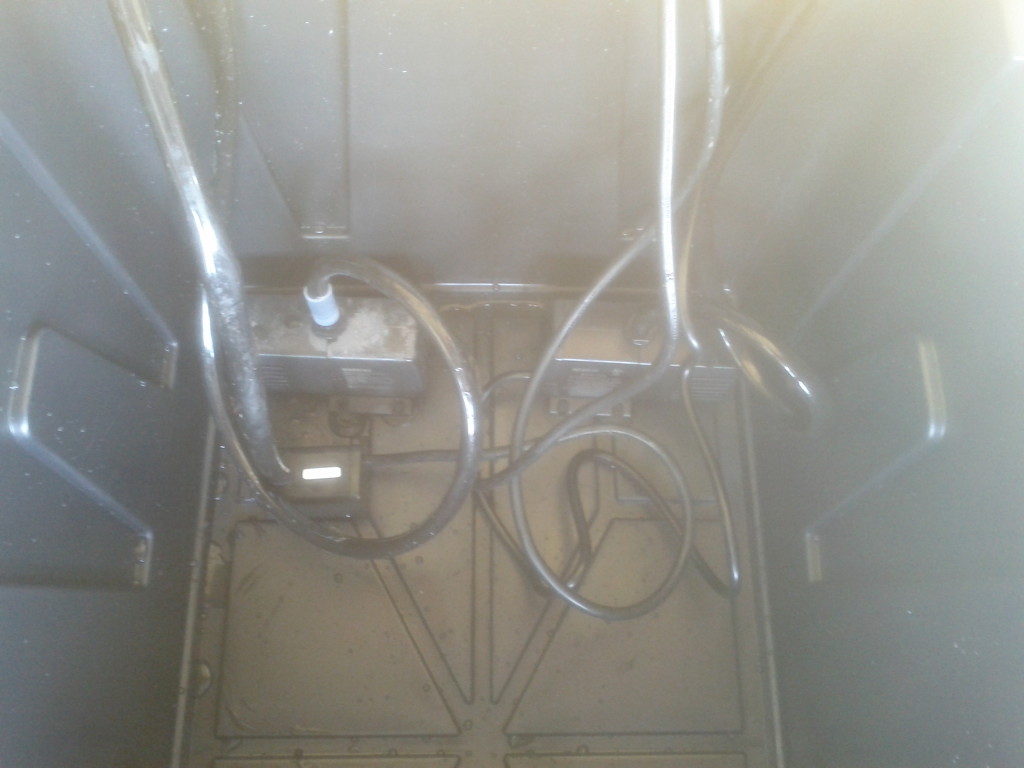 Inside the 27 gallon tote with pump installed
You will need to drill a hole in the lid or the side to accommodate the ½ inch CVPC drain tube that will be connected to the buckets.
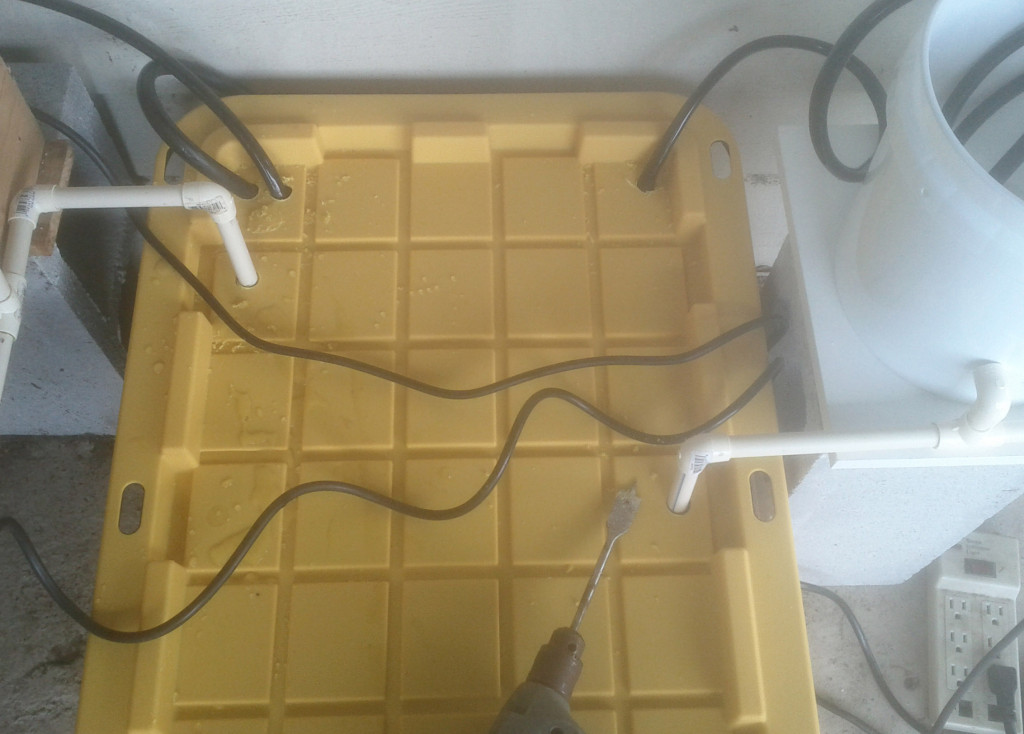 Tote lid with pump and drain lines drilled and filled
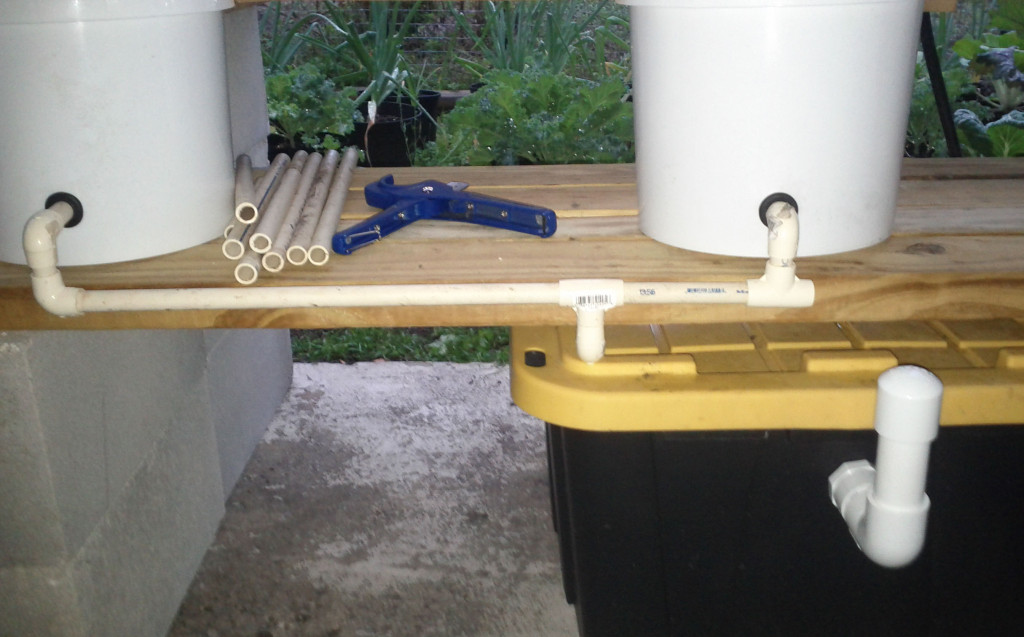
Once you have all the holes drilled and everything is in place, you can connect the ½ inch CVPC drain tube with the ½ tee to the elbow on the bucket like the picture above. I chose the ½ inch CVPC plastic plumbing pipe because of the low cost and ease of working with it. You do not have to glue any of the CVPC plastic pipe and fittings together because it is used for drainage only and the pipe is not under water pressure. Space the buckets about 12-18 inches apart.
Take the hose that is connected to the pump and run it along the backside of the buckets and cap off the end of the hose. Make sure the cap or plug is secured with a hose clamp because the line is pressurized. The thin black lines going into the top of the 2 gallon buckets are called feeder lines and these were purchased at a hydroponics store for about 20 cents each. They have pointed ends that poke through the pump hose fairly easy, or you can use a needle to start the hole. Push the feeder line into the pump hose about a ¼ of an inch. The hose will seal around the feeder hose by itself.
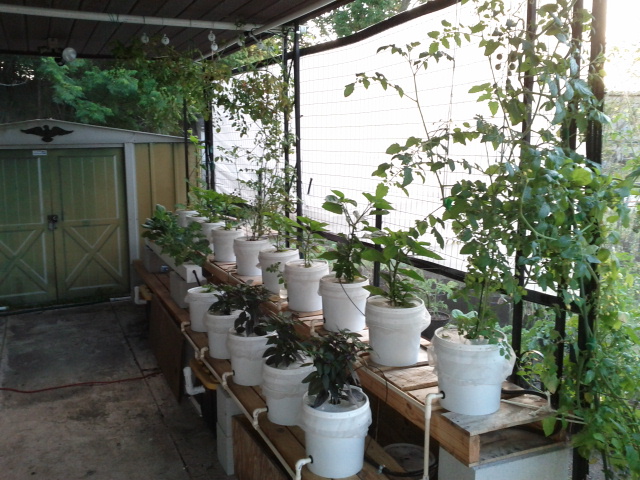
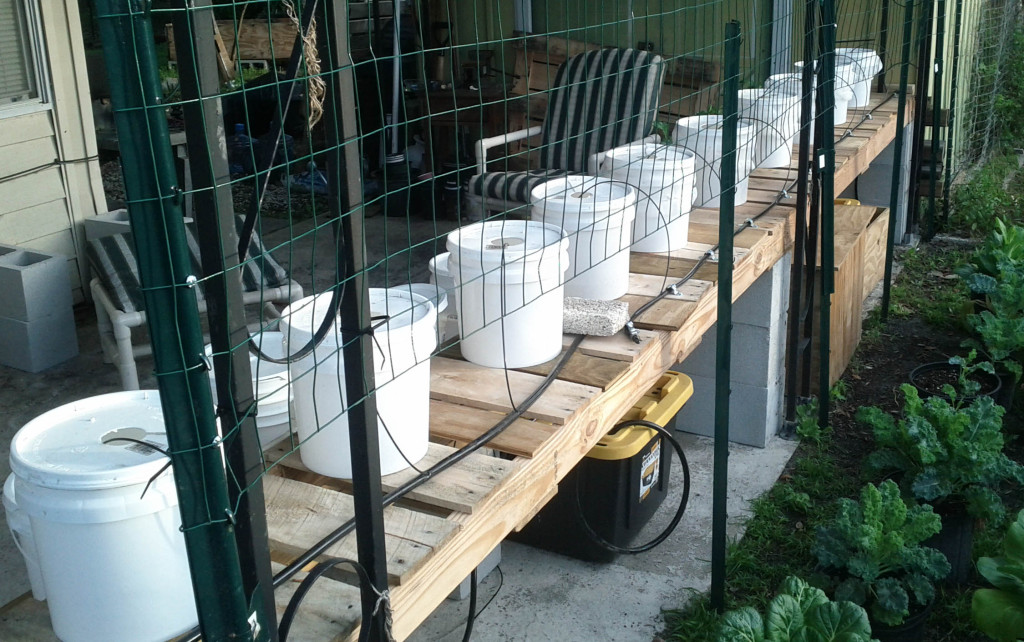 Bucket setup. Note the water reservoir/tote with pump and connections under the buckets.
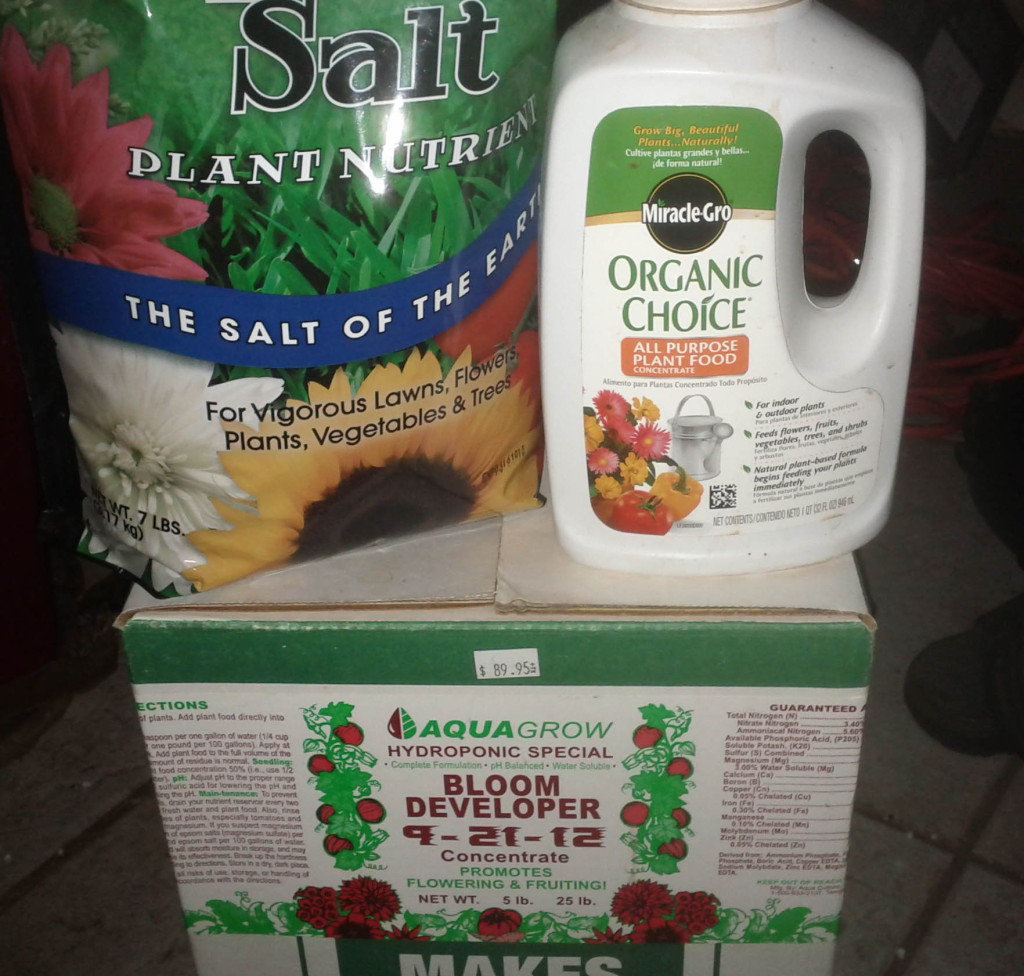
At this time you should fill the reservoir with the nutrient solution. I use a product from the hydroponics store called Aqua grow bloom developer 9-21-12. The cost was $90 but it makes 2500 gallons, enough to last many years. I also add Miracle Grow organic choice plant food. The mix ratio I use is 1 teaspoon per gallon on both mixes and I use a 1 for 1 ratio of Agua grow bloom and Miracle Grow plant food. At this time fill the tote 1/2 full, then add 1 gallon of water and a table spoon of Epson salt to the tote. This will help the ph level. The solution should have a light brown tint. I think the hardest part for me was getting the correct nutrient solution. I had help from the guys and gals at the hydroponics store for that.
Finally, it’s time to test the system. Plug in the pump and air bubbler and check to see if there is solution coming from the feeder lines. Let the system run for at least 15 minutes so the buckets begin to fill. As the water level in the buckets rise to the level of the drain elbow in the bottom of the bucket, it will start to drain back into the reservoir.
This is where you will discover any problems with drain pipe leakage or feeder line blockage if there are any. Feeder line blockage can be fix by removing from feeder hose and blowing through it to clear any obstructions. Leaks around the CVPC connections can be fixed by making sure they are tight and fitted correctly. The system can not have any leaks what so ever.
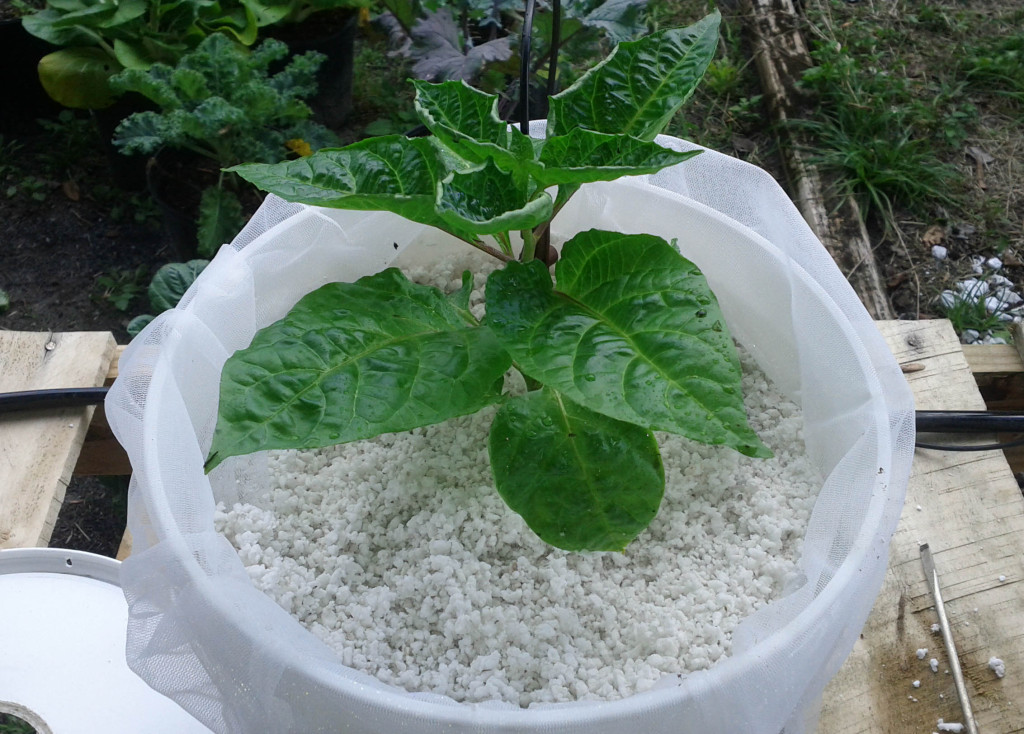
Next fill the buckets with Perlite. Have a gallon of mixed nutrient solution handy during this process. If you are filling the buckets with dry Perlite, then add the nutrient solution to moisten the Perlite as it’s filling. Fill to about 1 or 2 inches below the top of bucket without the lid on.
At this point the Perlite should be soaked with the nutrient solution. Create a hole with a stick or dowel all the way to the bottom of the bucket. This is where your roots will live. Repeat this process with the rest of the buckets. This is why you only fill the water reservoir half way, because as you’re preparing the Perlite buckets, the nutrient solution you are using to moisten the Perlite will fill the other half.
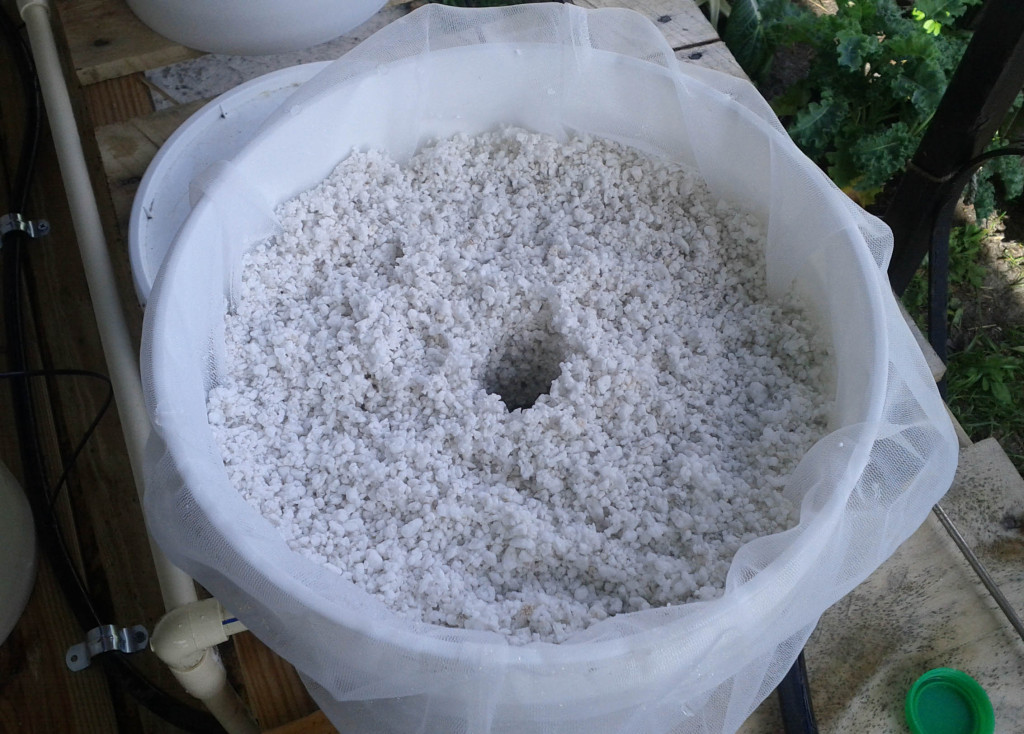 Ready to plant with Perlite and hole
When you put your starter plant down the hole in the center of the Perlite you want to make sure the roots are as clean as possible. You can gently rinse the dirt and debris from the roots. Once they are clean, insert the roots into the hole and use the the dowel or stick to gently push them down. Be careful not to tear them from the plant.
Then use the existing Perlite to fill in the hole where the roots lay. Be gentle while filling the hole with Perlite so you do not damage the roots and plant. You can now put the lid with the hole and split in it on the bucket. Gently place the hole in the lid around the plant, then secure the lid onto the bucket. If you don’t have a split in the lid, it’s harder to put the lid on and around the plant, also for fixing future problems as they arise.
Place the remaining plants in your buckets and don’t forget to put the feeder line into the hole in the lid so the solution pours directly on the roots. There is a little stake that will hold the feeder line in place right above the Perlite in the center of the bucket. The little stake can be replaced with a 4" long piece of CVPC to hold and guide the feeder line above the roots.
An outdoor timer and power strip will cost around $20. Set them to run 30 minutes 4-8 times per day. I have 15 buckets plus a rail system that only requires 6 gallons of water per week for 20 plants. Another cost benefit is that you use Perlite rather than soil. A large bag of Perlite is $12 and will fill every bucket with some left over. The growth rate is awesome and the plants are healthier. With this system it takes the hardest part of the equation out of gardening. Watering in my opinion is the biggest challenge in gardening.
Another great benefit to a system like this is all the different variations you can create using the basic components and ingredients. I have three friends who were inspired by my setup and they all did different things with similar setups. The common denominator is that they all work.
A Word on Indoor Gardens to Start Your Plants
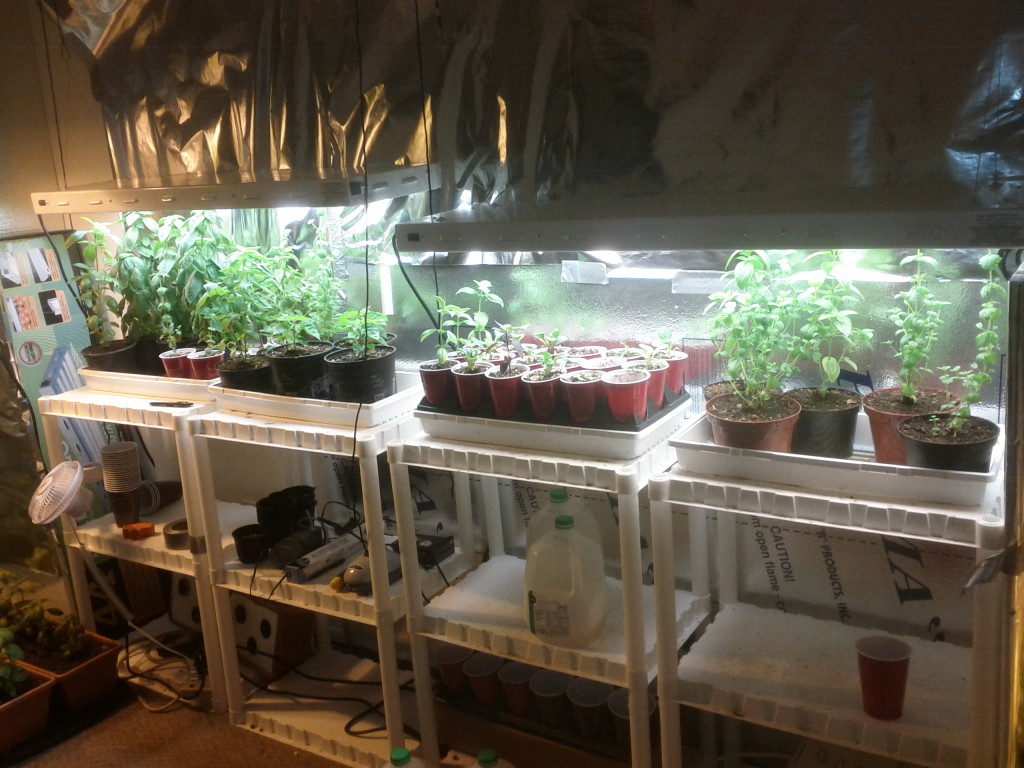
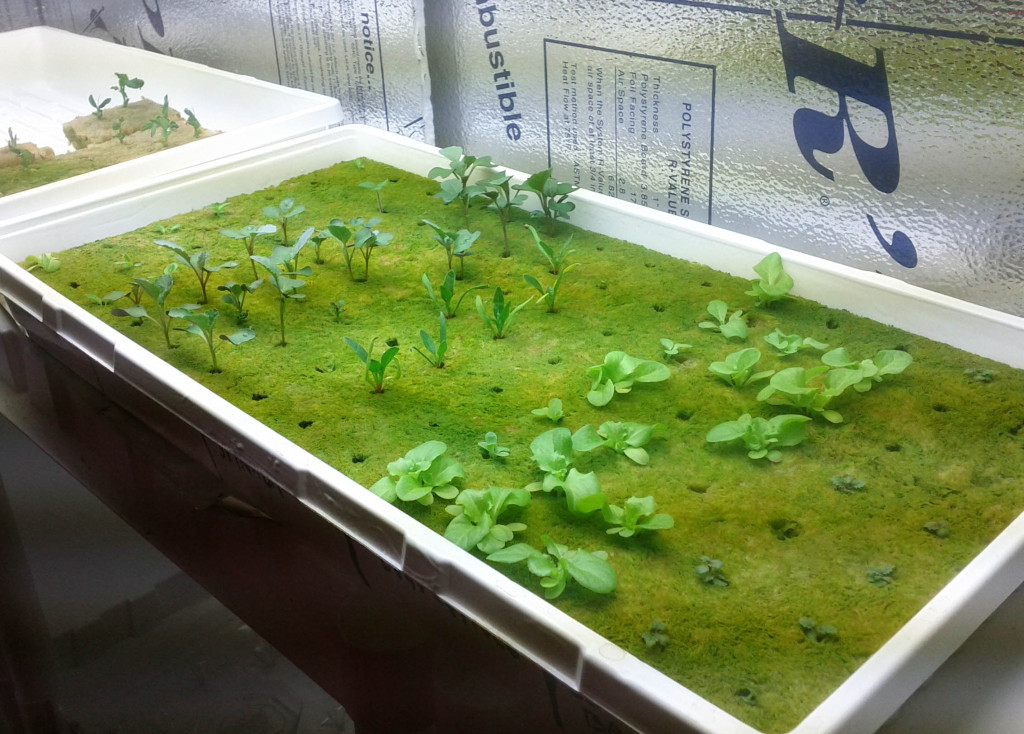
I started an indoor hydroponics set up in November of 2013 because I always hear people talking about starting plant indoors out of season. I took a little drive to my local Hydroponics store and picked up a few grow lights. The two light sets I got were T-5 four bulb fixtures @ $140 each. Grow trays were $3 each and rock wool slab was $13 each. Each rock wool slab can start 98 plants and each light accommodates 196 plant starts. I turned one of the extra bedrooms into a grow room and now have 7 lights. I also picked up a little window AC model for $60 to keep the room temperature constant. You don’t need all this stuff for one or two lights.
By starting the plants inside, it gives you time to prepare your garden outside.
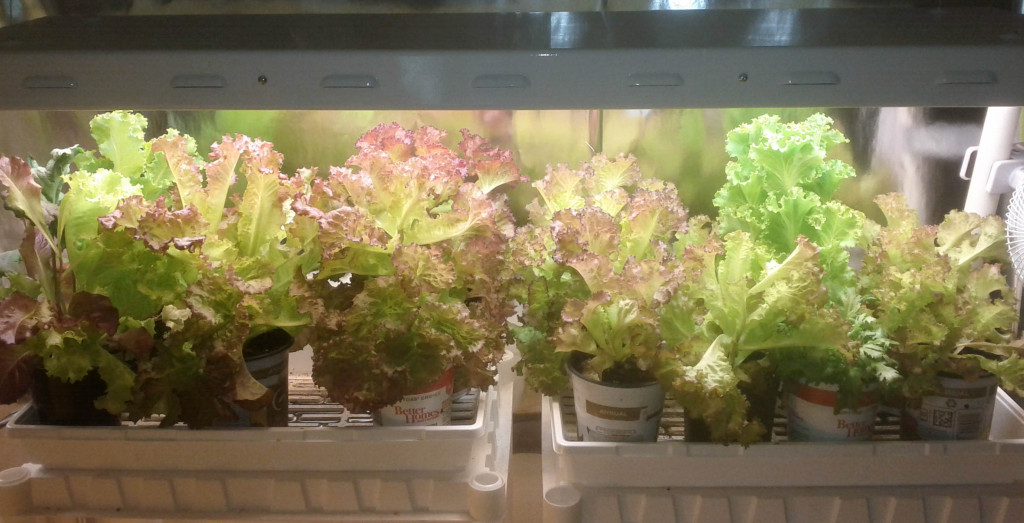
I also grew lettuce inside during the cold winter months of Nov, Dec and Jan, which was real nice. I will grow the lettuce inside again when it gets too hot during peak summer heat. With one four foot light you can start 196 plant starts in two rock wool trays. Think about all the different variations you can create with just one grow light.
I guess the entire point of this exercise is to ensure that I am growing my own produce in an organic environment. There are a lot of claims out there regarding organic produce. The only way to know for sure what you are eating is to grow it yourself.
The Urban Pepper
I always get hungry looking at your images, even when you leave the bacon out. :-)
Most of my starter plants were mediocre at best this year. Yours look so healthy. How many weeks does it take you to grow a hearty pepper plant about 6-8 inches high for transplant when you start it under the lights?
Mrs Cog,
6 to 8 weeks, the peppers take a couple of weeks in the rock wool. When the roots come out of the bottom of the rock wool cube I put them in a small container( solo cup works) with soil and perlite mix. I watered them when needed and the lights do the rest. I tinkered around with the lights duration time from 12 to16 hours per day.
There’s a big difference when transplanting a small and medium plant. I have two Trinidad scorpion ( death peppers) one I planted too early and it’s struggling today, the other I left in the room for two additional weeks and it’s very healthy and almost budding:)
I think you’re getting lights for Christmas from Mr Cog this year.
Mr Pepper
Thank you for the step-by-step! Not quite idiot-proof enough for a plumbing-phobe like me, but maybe with some help I can get something started. :-)
Zen,
As well read that you are:) I know you can do this. Help is only a post away on TIF.
Thanks
Mr Pepper
What is your desired EC and pH?
How often do you check your solution for both?