by Mrs. Cog
Over the past week, as my tennis ball saga continued I learned a number of valuable lessons. If anyone missed my accidental discovery and initial wonderment over black walnuts appearing in our back yard, you can find it here.
First lesson. It hurts to get clunked in the head by green walnut pods free falling from heights of 70 or more feet. I now understand why people wear motorcycle or football helmets to gather them, especially when the nuts are ripe and falling while the wind blows.
Second, the pulp between the outer green husk and the inner hard nut shell is a powerful black dye. If anyone knowledgeable in this area knows how long this will remain on my hands or a substance that will remove it, please contact the webmaster to share. In my defense I did wear nitrile gloves to remove the husks, but every hour to hour and a half I would notice a finger had torn away and exposed my fingertip. It was cute at first; with one discolored index finger I resembled an Iraqi voter. Now all my fingertips are blackened.
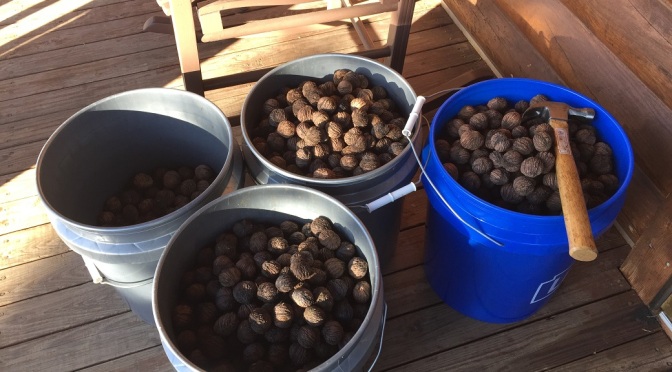
Third, the process of “using the whole buffalo” as it applies to black walnuts is extremely time consuming and potentially frustrating if one doesn’t know what to expect beforehand. Working for three whole days in order to end up with 3 ½ five gallon buckets of nuts still in their shells, six 4 oz. jars of black walnut salve and an enormous new pile of organic compost (far from the garden) which will act as an organic herbicide as it degrades, may seem like an outsized commitment. In the end, I found the experience completely worth the time, effort and challenges because I now have three powerful items (healthy nuts, medicinal salve and natural weed killer) which cost me nothing except my time and labor and more self-sufficient confirmation endorphins.
Just for the record, here is what I did. In order to crush the majority of hulls to extract the nuts, I spread some out over a tarp on our gravel driveway and proceeded to run over them repeatedly with our lawn tractor. For some reason Cog found this highly entertaining and took video footage which I promise you will never see.
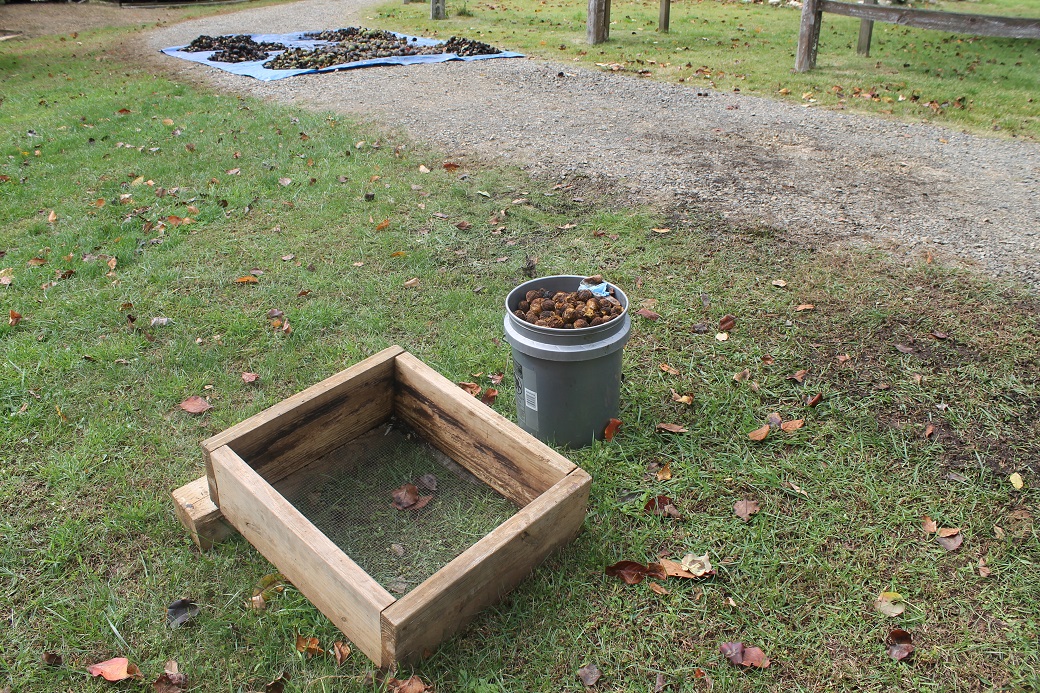
Next I plopped down on the tarp and swatted at the aggressive bees as I pulled each sticky nut from its hull. As I freed each pulp coated and goopy nut from the hull, I would take a break every 75-100 nuts and pressure wash them in a wooden box with a screen mesh bottom. After getting most of what would detach from the nut shell off, I would spread them on the gravel driveway to dry for several hours and return to the tarp to de-hull the next batch. I did this for two days.
As I was hauling the unused outer portions to a place where they could decompose safely away from other plants they could kill, I was conked in the head with fresh falling tennis balls. After finishing the second day of work, I gathered a five gallon bucket of fresh fallen ones. I smashed each of them once or twice with a hammer, extracted the nut and put the fresh hulls into a kettle.
Once inside I cut many of the freshest green rinds with their pulp into bite sized pieces. I then crushed a small handful at a time into paste using the mortar and pestle. As they turned to mush, I added them to coconut oil I had simmering in a stainless (non-reactive) pot on the stove. The paste and pulp stained everything it touched. I was careful to use disposable craft sticks to stir the concoction and make sure nothing touched the counter-tops.
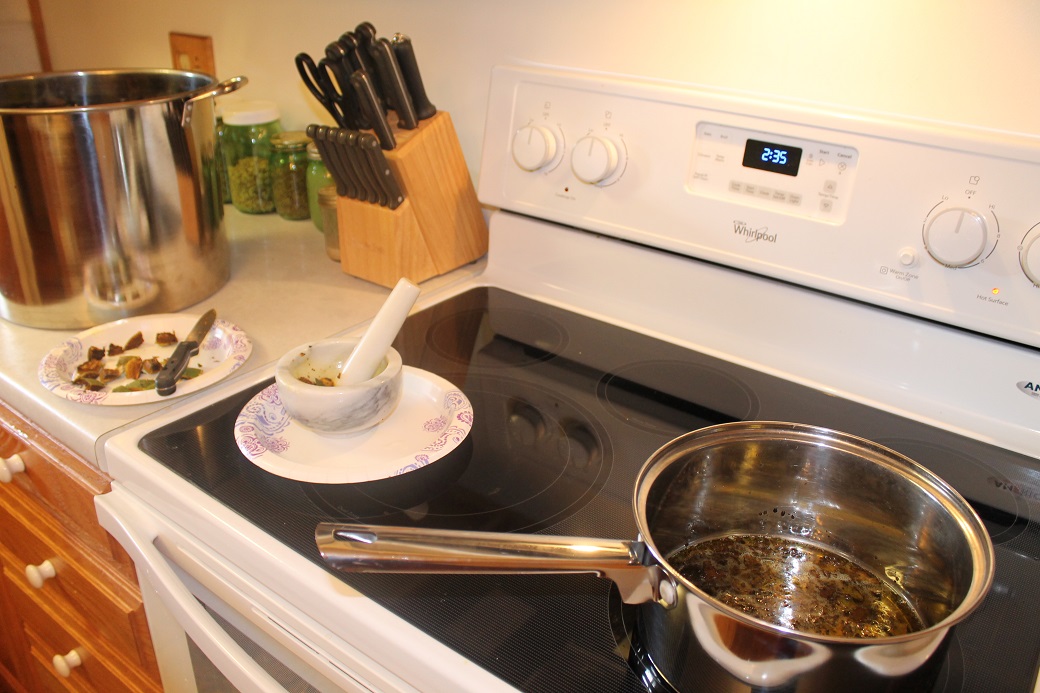
After the oil and walnut hull paste had simmered gently for more than an hour, I drained it in a fine mesh colander lined with cheesecloth into a glass bowl. It was a dark green-blackish color with a fine sediment settling at the bottom.
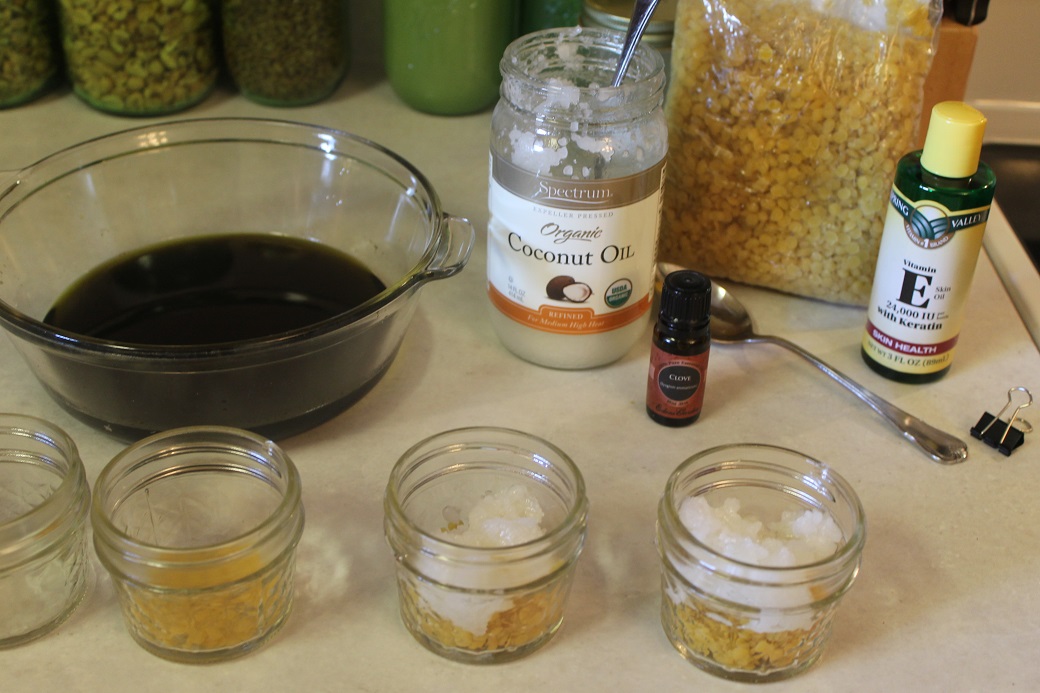
I gathered up six 4oz. mason jars and in each I added:
- 2 Tablespoons organic beeswax pellets
- 6 Tablespoons of the black walnut/coconut oil
- ¼ Tablespoon liquid Vitamin E
- 5-6 drops clove essential oil
With two of the small jars, I added an extra Tablespoon of coconut oil to one and two extra to another so I could experiment with the firmness and spread-ability of the final product. I found that a 1:4 or 1:5 ratio of beeswax to oil makes a good consistency.
One by one, I put the small jars with all their ingredients into less than two inches of boiling water in a pot for about two minutes to thoroughly melt the beeswax. I stirred several times while it melted with a wooden craft stick I could throw away when finished. When the jars were finished melting, I placed them on a towel to become cool and firm over several hours.
Does it sound like a lot of work for a few jars of ugly green goopy salve? Because the real work has not yet begun.
Black walnuts, the nut itself, cannot be opened with a nutcracker. There are only two options I have found. One is a hammer which often splatters sharp nut shells in every direction. The other is a mounted vise like one finds in a wood worker's or mechanic’s shop. Once cracked the meat of the nut is not easy to extract.
I have 4-8 weeks before the nuts have dried enough to begin opening. I look forward to spending many hours in Cog’s workshop later this fall, sitting at his vise while he works on various projects. And here I always thought it was Cognitive Dissonance who was the tough nut to crack.
Hi Mrs Cog:
That black wears off, eventually. That stuff is one of the things you can use to tan hides. So your hide is tanned and as the new skin grows in the old tanned hide will fall away. Someday……….
Cracking walnuts in a vise is going to take a loooooong time. I hope your shop area is heated. This new hunter-gatherer life style might get a little chilly.
The garage/workshop is heated using a second heat exchanger fed by the Heatmaster 5000 wood stove boiler. Turn it on in the dead of winter and after ten minutes you’re pealing off jackets and sweaters.
https://twoicefloes.com/on-the-mountain/power-sources/wood-stove-boiler-heatmaster-5000-p/
Cognitive Dissonance
You’re gonna need a bigger tractor. ;p
I remember having home made(Amish possibly) black walnut ice cream from somewhere when I was a kid growing up in Wayne County Ohio. It was out of this world. Never had anything like it again.
About those stains…from the “Made Man”
Hi, Fellow DyeMeisters:
I couldn’t resist, Dis:
What kind of ‘soup’ did you have in mind? Chicken noodle? Chili con Carne? Too funny! :) Thanks for making me laugh out loud! LOL!
And thank you, Mrs. C., for the step-by-step on salve-making. Good job! You’ve really gotten the hang of how-to instruction. Images help a LOT. My first iteration as a self-sustaining adult was a very long corp-stint as a writer/editor for craft how-to books. It’s an art form for sure, in order to transmit accurate and useable info to distant readers. Just think of all of the foreign-language attempts at providing ‘useful’ (read: infuriating/funny/ridiculous) directions for ‘some assembly required’ items mail-ordered or ferried home from local furniture stores! :) I rest my case . . .
Now, to the serious stuff: In my checkered experience with black walnuts, I had little success with attempting to remove the discoloration easily so will also try the lemon juice approach – but the stain does wear off in time, so don’t despair if the lemony results are less-than-ideal. Do note that these hulls have multiple uses beyond medicinal salves. As OtB shares, this is a primo dyestuff for tanning hides – as well as for a brunette hair rinse and use in yarn/fabric dyeing – subjects I know rather a lot about.
To make the whole messy process easier, you might consider making/using the kind of drying trays I mentioned in the first article thread on this subject. Drying black walnuts in their hulls retains the dye/chemical factor while greatly reducing the ‘juicy-ness’ factor and thus the stain factor. One can simply use the chopped-up shriveled hulls with shell bits attached in concocting your recipes rather than messing (literally) about with them when fresh. Just smash and grab the nutmeats, and throw the remainder into the dye/salve/whatever pot for cooking down. When they are soft, you can separate them all in one go, a lot easier and less stain-y.
When I first moved out here to the deep country, I scavenged simply everything I could lay my hands on, and canned my sweet little patootie off. Now, after a few years of this under my belt, I’ve backed off a bit on securing the bounty of Nature. One can only can/dry/preserve/freeze/retain so much from what is naturally out there for the discovering. :) Later, it gets more fun and less of a mission. Now, instead of rough applesauce, I’m creating preserves with character, discovering Italian grape syrup, making super-HOT chili sauce and saving up the various sunflower seeds, etc. to turn our barren ‘park’ here into a flowering meadow over the next few years.
And, once the serious goods are laid down, there’s fun to be had. I had a young NA friend make me a set of hide-dressing tools straight out of the old handbooks, since we do accept a once-a-year ‘deer give-away’ from Mom Nature. I hate to waste anything, so hides/hooves/bone/sinew/etc. all count, and having the tools to deal with them is very handy. Hide-processing is hard work, but walnut dye works very well within that process for hide-tanning, let alone creating a very beautiful – and durable – finish on leather. We didn’t hunt this year – but will, next. And when we do, I’ll be ready for a whole new experience: hide-tanning the old-fashioned way! Stay tuned . . .
Cheers! :)
LionLady
Awww, you guys rock!
I tried the lemon juice Dis… I think I waited too long. :-) I have made a note for next time just in case – you know – it comes up again.
OntheBeach – Cog’s workshop is indeed heated. I have to wonder if he isn’t holding his breath at the prospect of having me invade his mancave for hours on end to crack walnuts. Perhaps if I promise not to sing to him ♫ lol…
Lion Lady – whatdaya mean I can let the hulls dry first? LOL – I can’t tell you how many places I looked and finally concluded I could only use the freshest ones. Hahaha – the joke is on me. Dried would have been ten times easier. Too funny. I have taken furious notes for next time.
Thank you everyone. :-)
Well it does say about the lemon juice:
“Depending on the severity of the walnut stain, it may take two or three applications to see a difference.”
If that fails go with more soup! lol! What kind of soup asks the impertinent Lion? Well whatever Mrs. Cog canned the most of, personally I’d go with whichever one has the zucchini in the mix. :p
See that’s what happens when you can’t edit on this side of TIF…
So basically I soak her for 24 hours, then ring her out and hang her up? :-)
Cognitive Dissonance
Hahaha Disenchanted:
After reading that explanation of how to wash walnut stains out of your hands I really wanted to edit it:
First, before you start, make 3 stiff drinks. Drink one of them.
Do the entire 300 word, 45 minute washing process.
Look down at your still stained hands.
Drink the other 2 drinks to help you feel better about the whole lost cause.
We grew up close to an old abandoned olive grove in SoCal. Few things make a mom more upset than her kids getting in a huge war with friends using ripe purple olives as ammo. That stuff does not come out at all.
LOL @ OtB
Plan B for Mrs. Cog.
Make more drinks, run hot bath, throw in remaining black walnut hulls, steep in bath until rest of body matches stained fingers and hands. Good to go… ;O)
LOL – maybe I should try the soup Disenchanted. I’ve read only tomato juice will remove skunk spray, perhaps my (excess) stash of tomato soup will have some effect towards removing the walnut juice remnants. :-)
Cog laughed out loud at your idea of dying my entire self to match my fingers.
And each day the dye/stain fades more. Today my fingertips simply look like I have been sketching with pencils in art class. Tomorrow I am hoping for a lighter shade along the lines of newspaper print like when we made the old school comic strips print onto our silly putty. :-)
@ Disenchanted
Ummmmm…..do I have any say in this matter?
Cognitive Dissonance
I don’t know…do you? ;p They say once you go black walnut, you never…that’s all I got.
@Mrs. Cog…ha, I remember doing that comic strip/silly putty thing a few times.
@ OTB
Note to the TIF crew.
Red Virginia clay also does not come out of work clothes. And sooner or later every piece of clothing you own becomes work clothes when you live and work on the Virginia homestead.
Cognitive Dissonance
Too funny Disenchanted. A tie dyed hunter-gatherer.
CD:
Oh I had forgotten all about that clay, miserable stuff. In Houston where I lived and worked for years it is black and was called black gumbo. This time of the year it drizzles rain a lot and the streets in my subdivisions would become impossible if I did not hire someone with a tractor and box-blade to drag them all day long. I used to have to keep a wrecker on site to pull cars and trucks out. A 2 wheel drive could get stuck in 1/2 inch of that crap. By the end of everyday we would all be black from head to toe and at least 2 inches taller than we were at 7 AM.
Do you know of these work clothes:
http://www.carhartt.com/webapp/wcs/stores/servlet/ProductDisplay?catalogId=10101&storeId=10051&productId=32060&langId=-1
These are twill, not denim, and are the right color for your goop. We started using them in Seattle because they are so much warmer than jeans and last so much longer.
OtB
I am just lucky with these articles… in a timely twist of fate, it turns out today is National Nut Day,